Edit Location profile
When you first sign up to Smilenotes, a primary Location is created automatically. Before sending email notifications or reminders, you must enter valid business contact details.
-
Click “Manage Profile”
Go to Settings → Schedule → Locations and select Manage Profile.
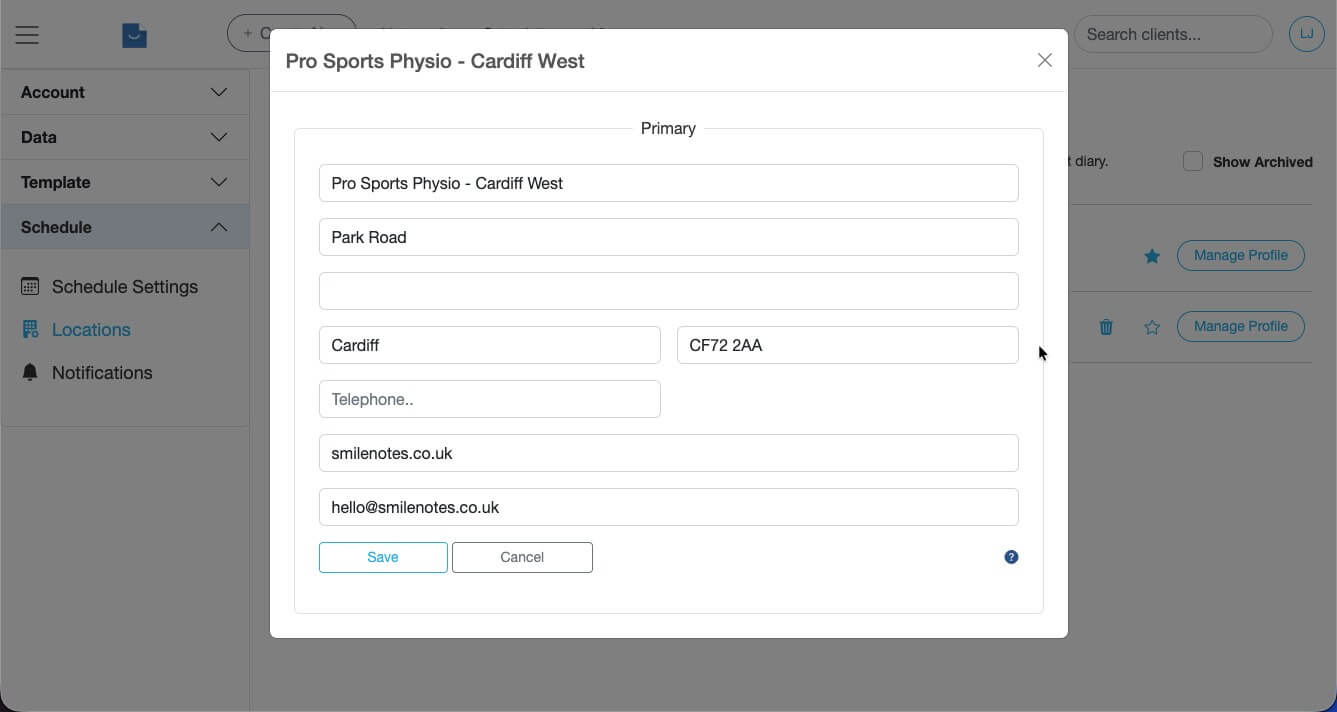
Enter practice name, address and contact details before saving. - Click “Save”
Add additional Locations
Locations are managed from the settings page by selecting Schedule > Locations.
If you have multiple physical practice sites you'll need to add separate Locations for each site.
This is ideal for practices operating across multiple sites who need separate appointment calendars per practice location.
-
Click “Add Location”
Go to Settings → Schedule → Locations and select Add Location.
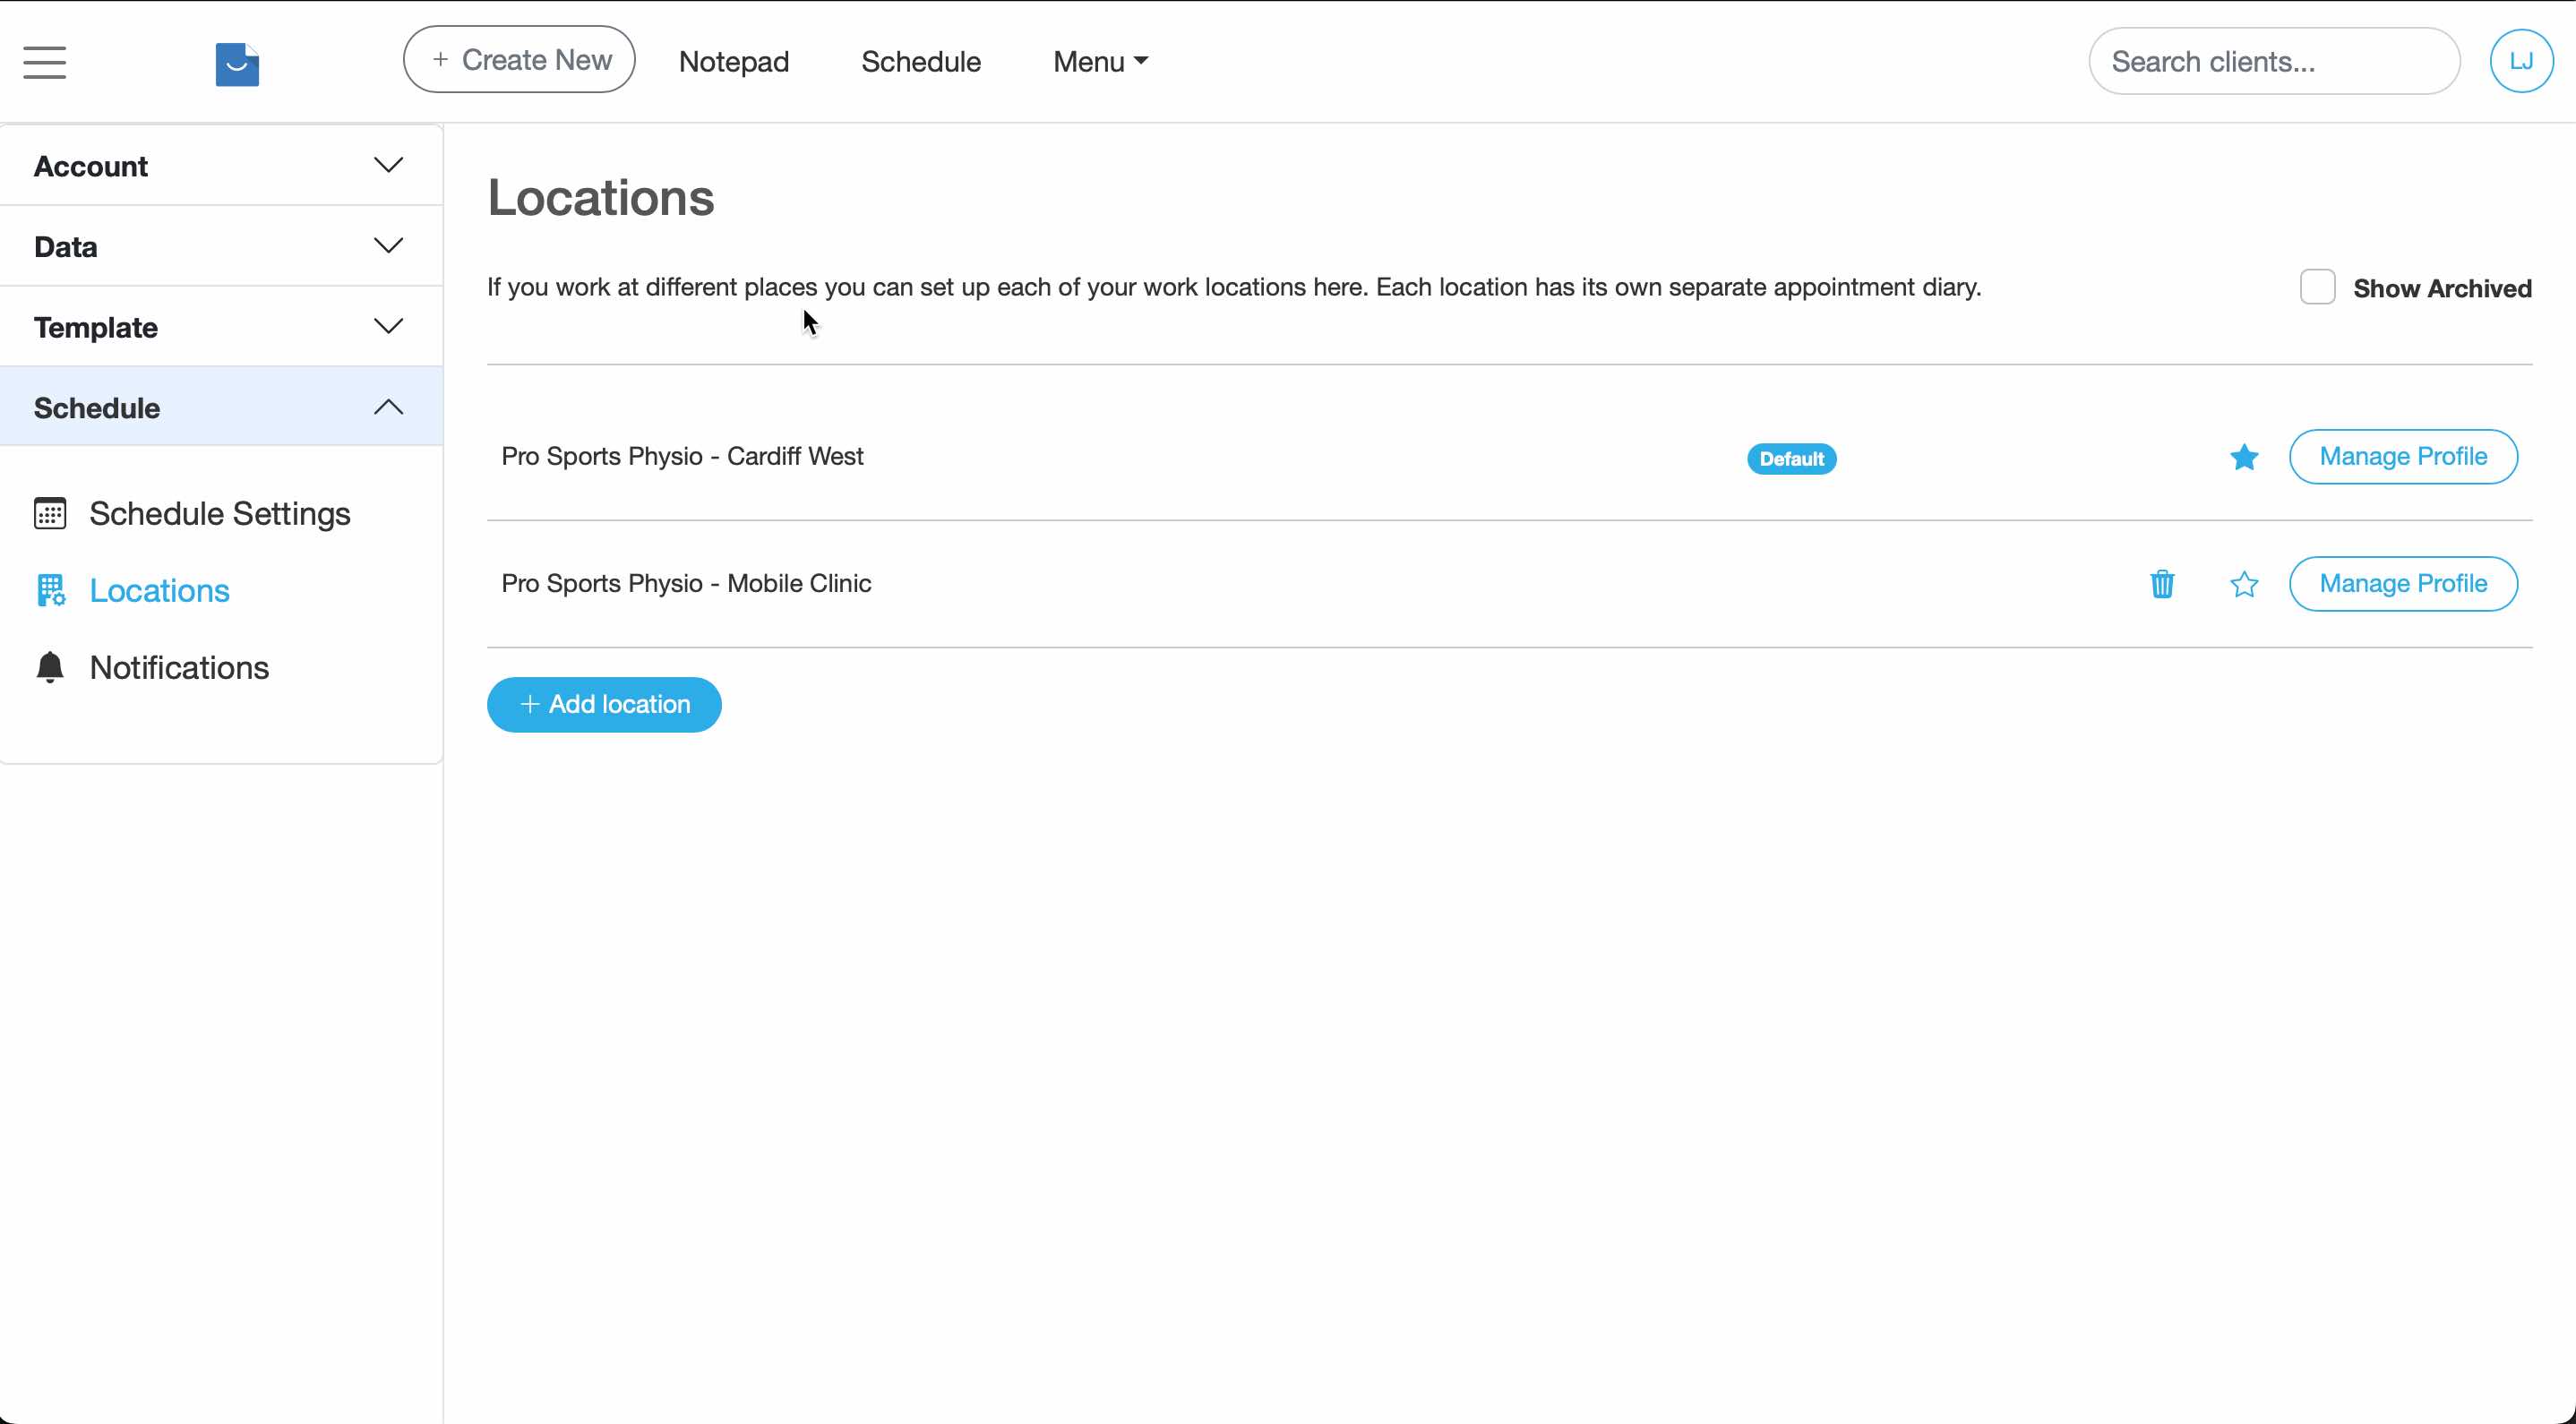
Location settings page showing existing practice sites. -
Complete the Location profile and click save to add the new location.
Enter practice name, address and contact details before saving. - This new location will now have its own separate appointment calendar.
Switch Locations
-
Go to the Schedule page and select the Location you wish to use from the dropdown. You will now be using the appointment calendar for that Location.
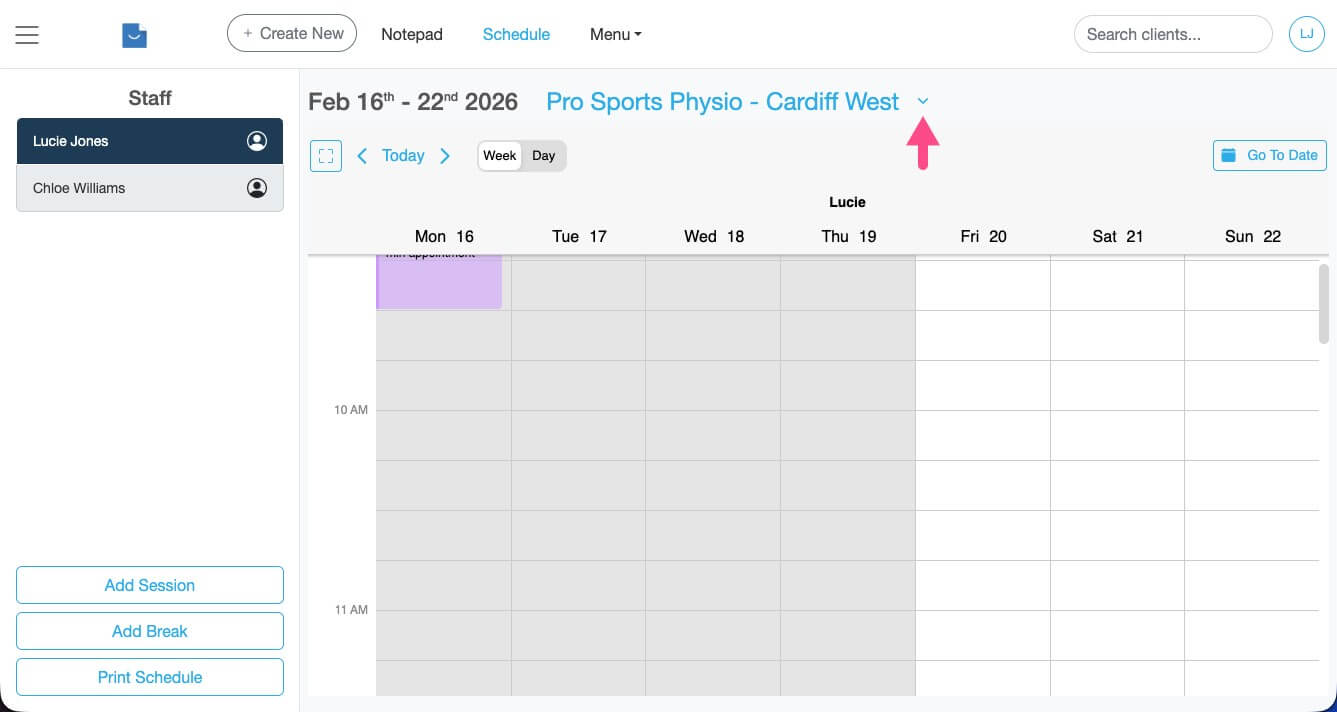
Use the dropdown in the Schedule view to change Location.
Select a Location when signing in
-
When you sign in to Smilenotes, simply select the Location you wish to use then click Sign in. The appointment calendar will now show the appointments and team members assigned to this Location.
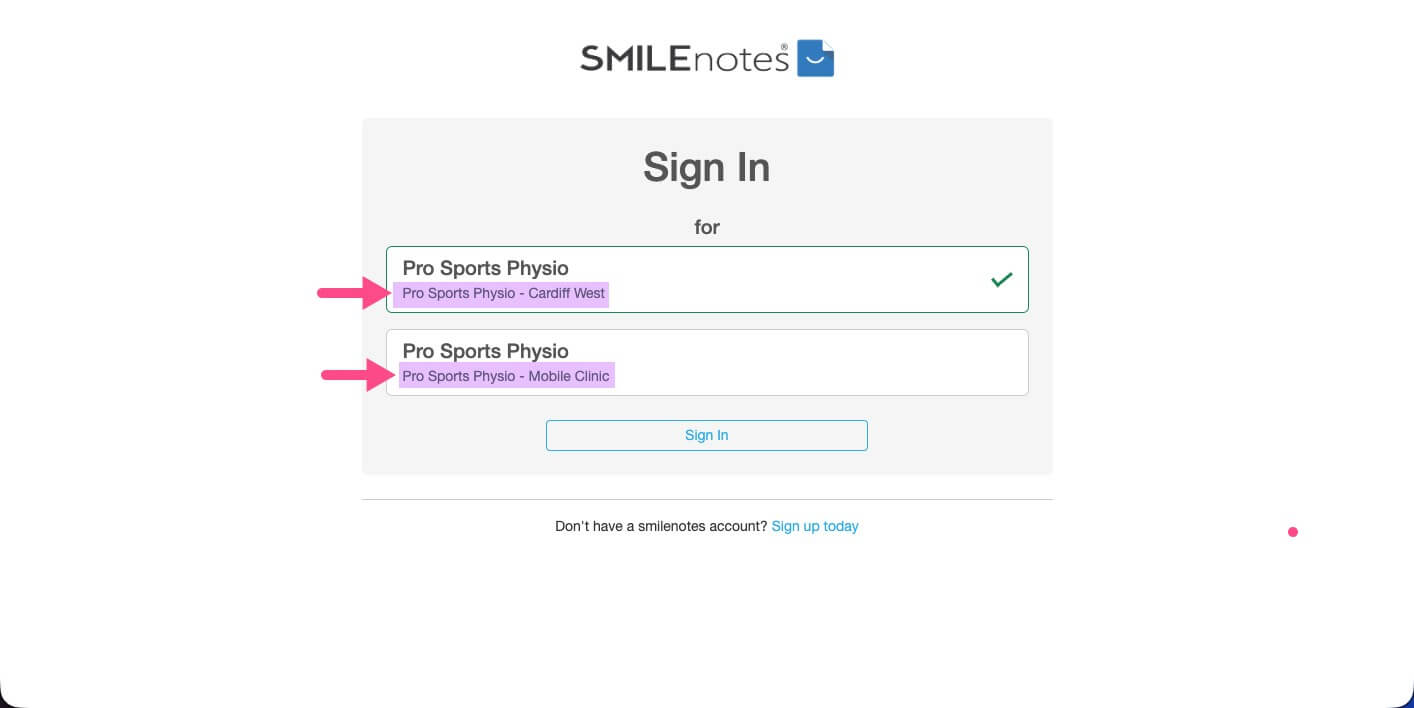
Select your Location before logging in.
Archive Locations you no longer need
-
On the settings page (Settings > Schedule > Locations), click "Manage Profile" next to the location.
Watch the short video below to see how to archive a Location.
Archive a Location by toggling the Active switch in the Location profile. - Toggle the switch in the location profile to make the location "active" or "archived" and save the changes.
Updated: 11 February 2026