Start here (for all templates)
- Go to the Notepad
- Ensure the correct template Collection is loaded. Switch to another Collection if needed by clicking on the three-dots menu (⋯) in the side panel and selecting a Collection.
-
Click Edit Templates
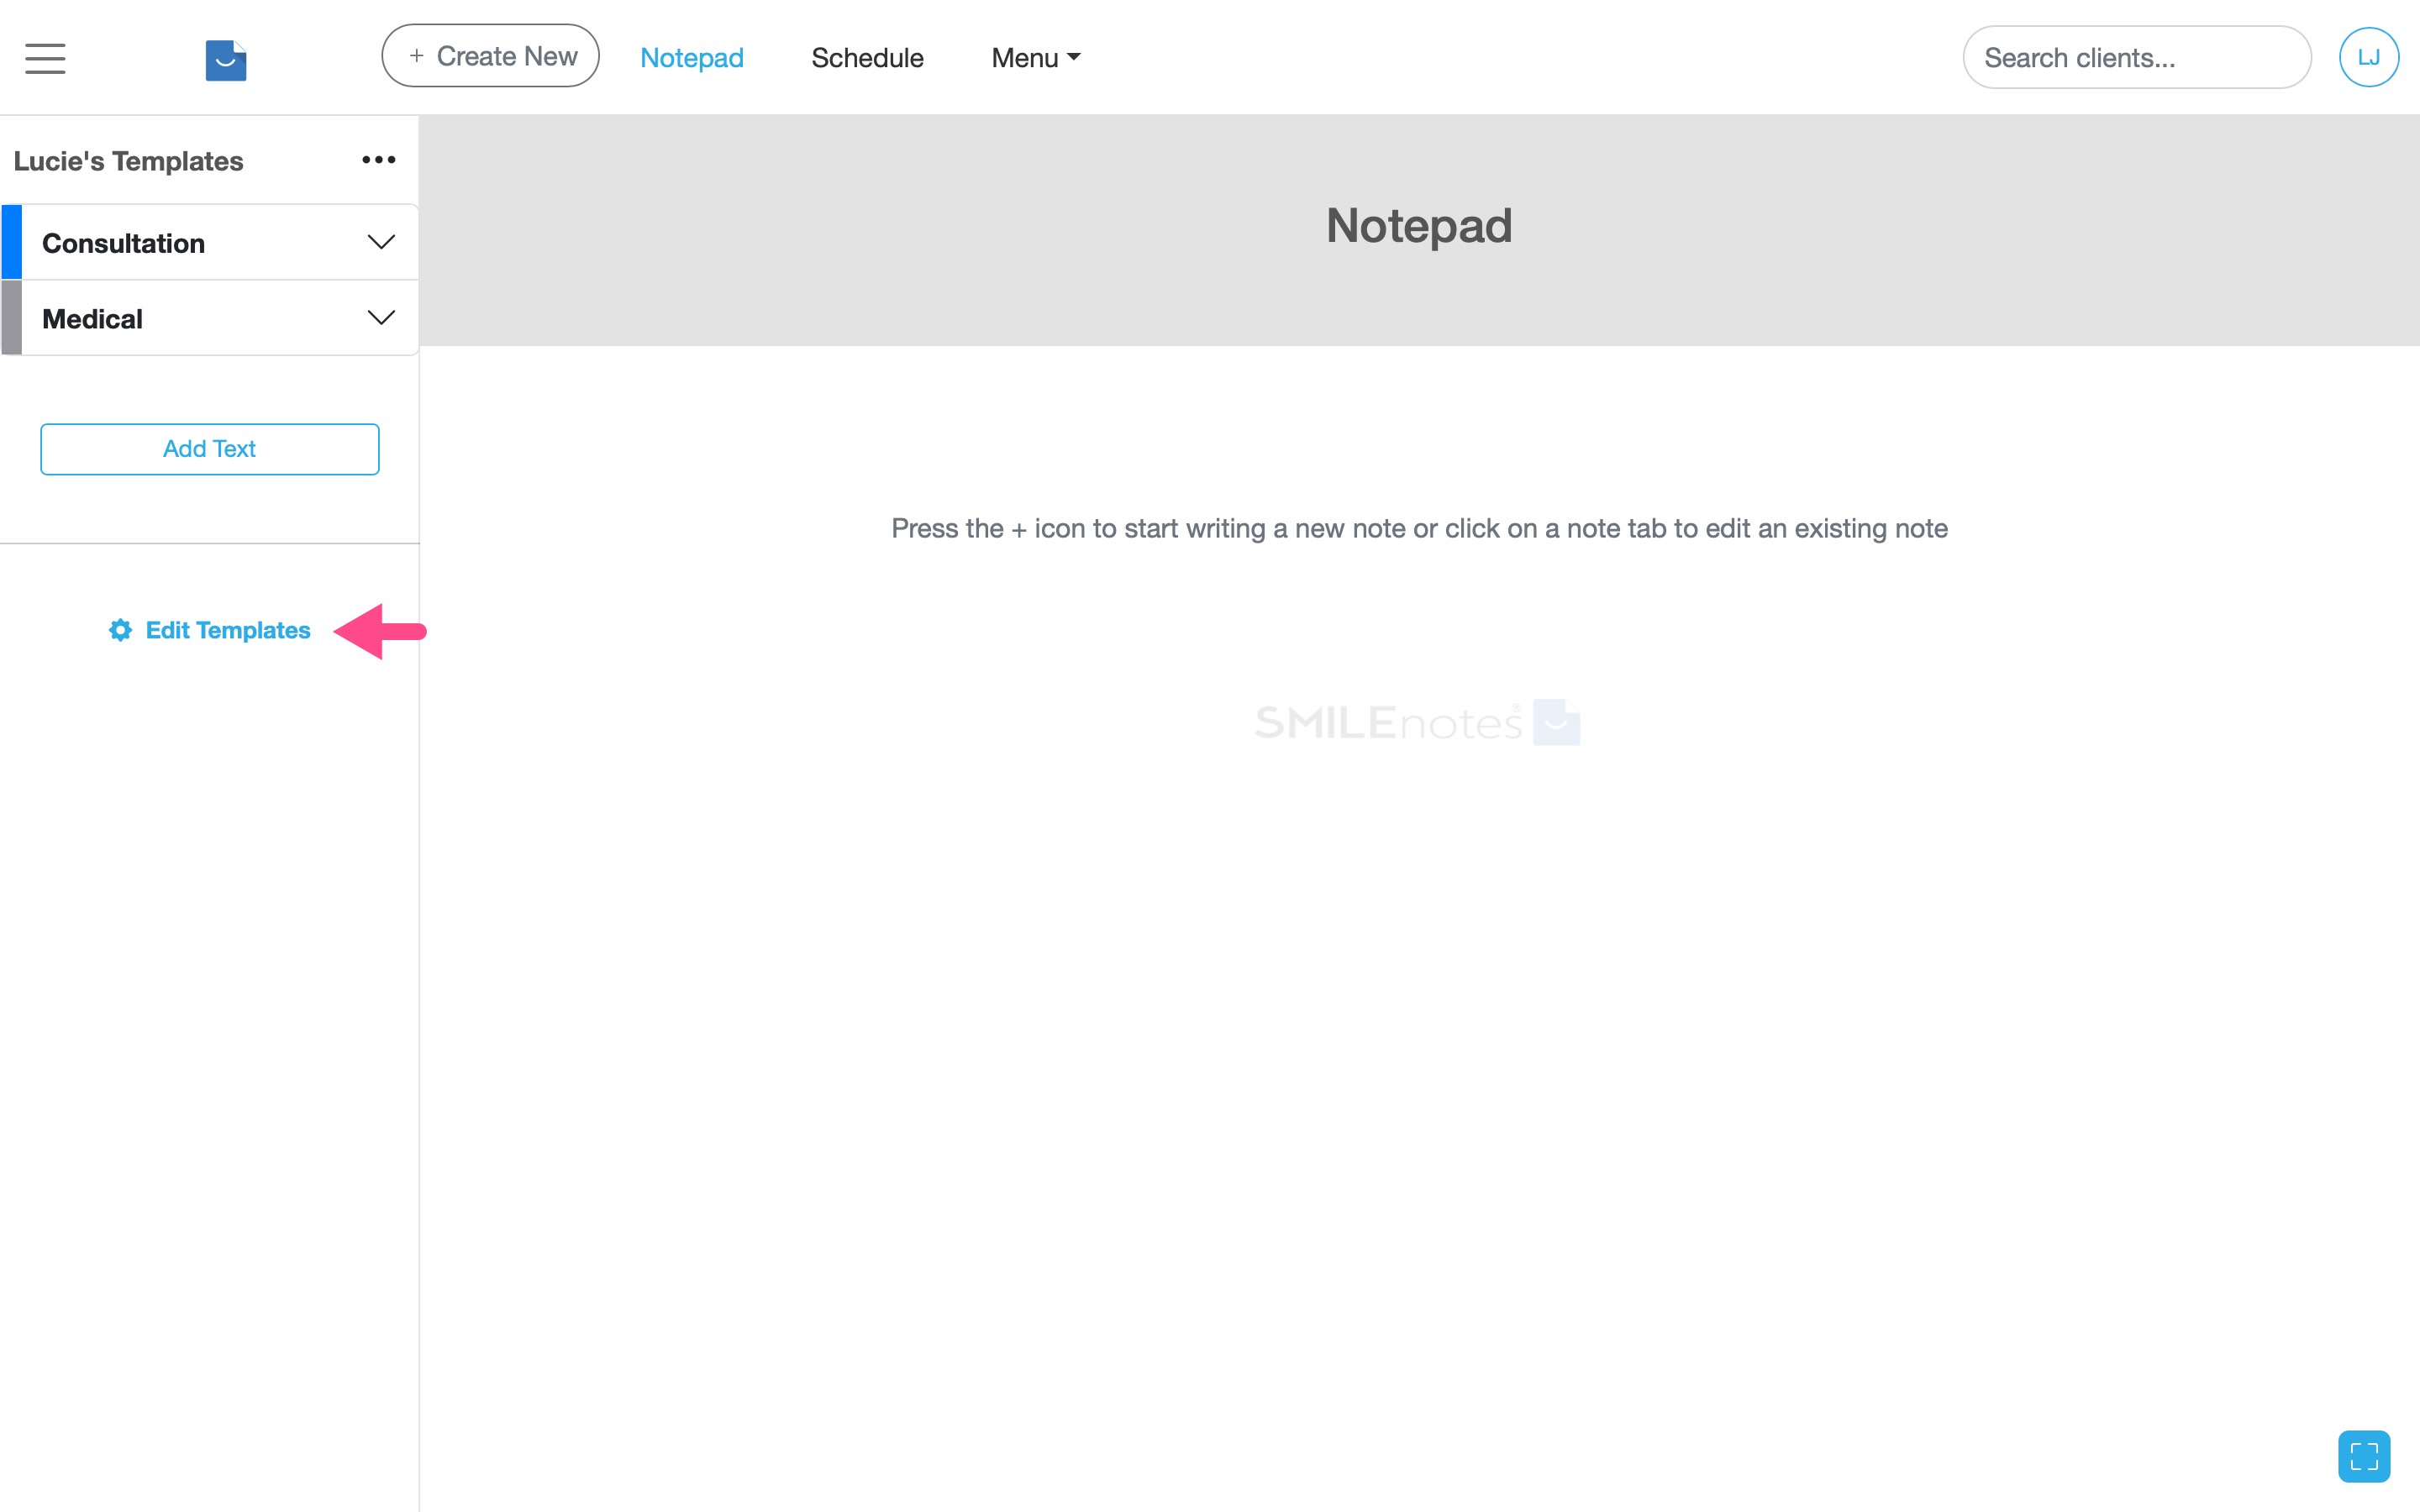
Select “Edit Templates” in the Notepad to manage your template Collection and Categories. In this example we are editing the template Collection called "Lucie's Templates". -
Select a Category and click Add Template
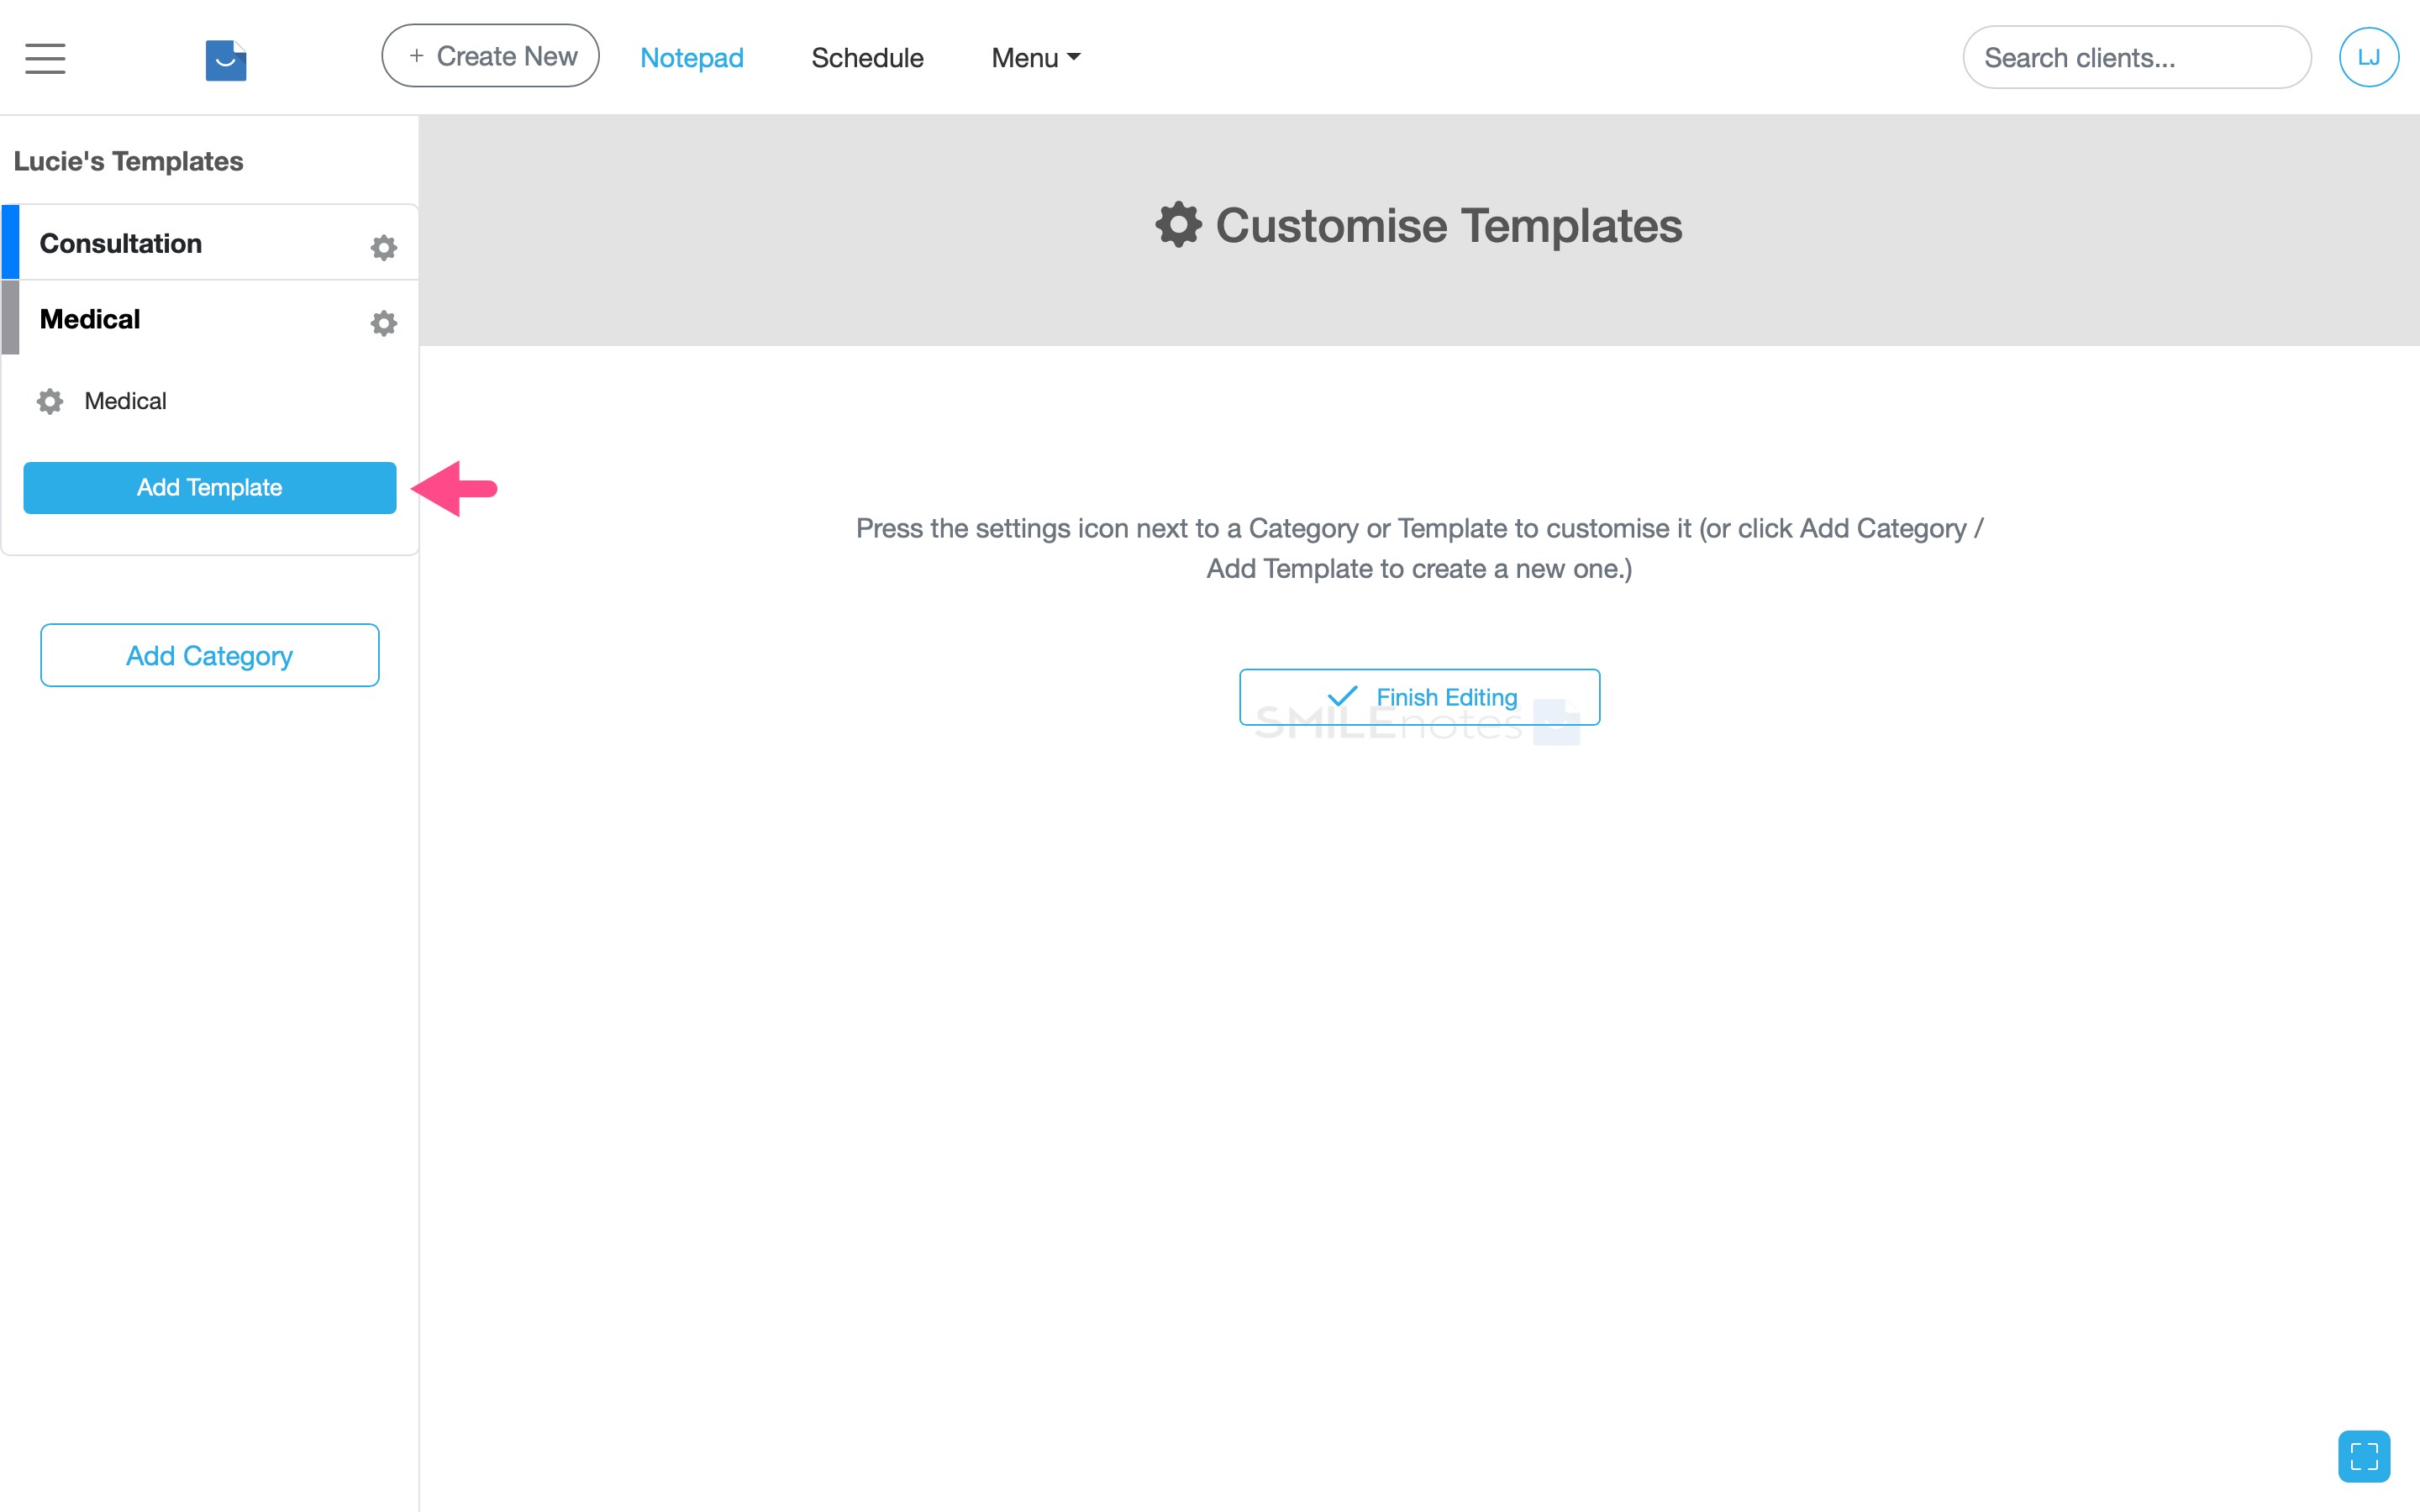
Click “Add Template” inside a Category to create a new note template.
How to create basic note templates
Basic templates are plain text. They are organised into Categories (subfolders) and stored inside a Collection.
How to create a Template Collection
-
Click Add Template. In the new template window, select Basic.
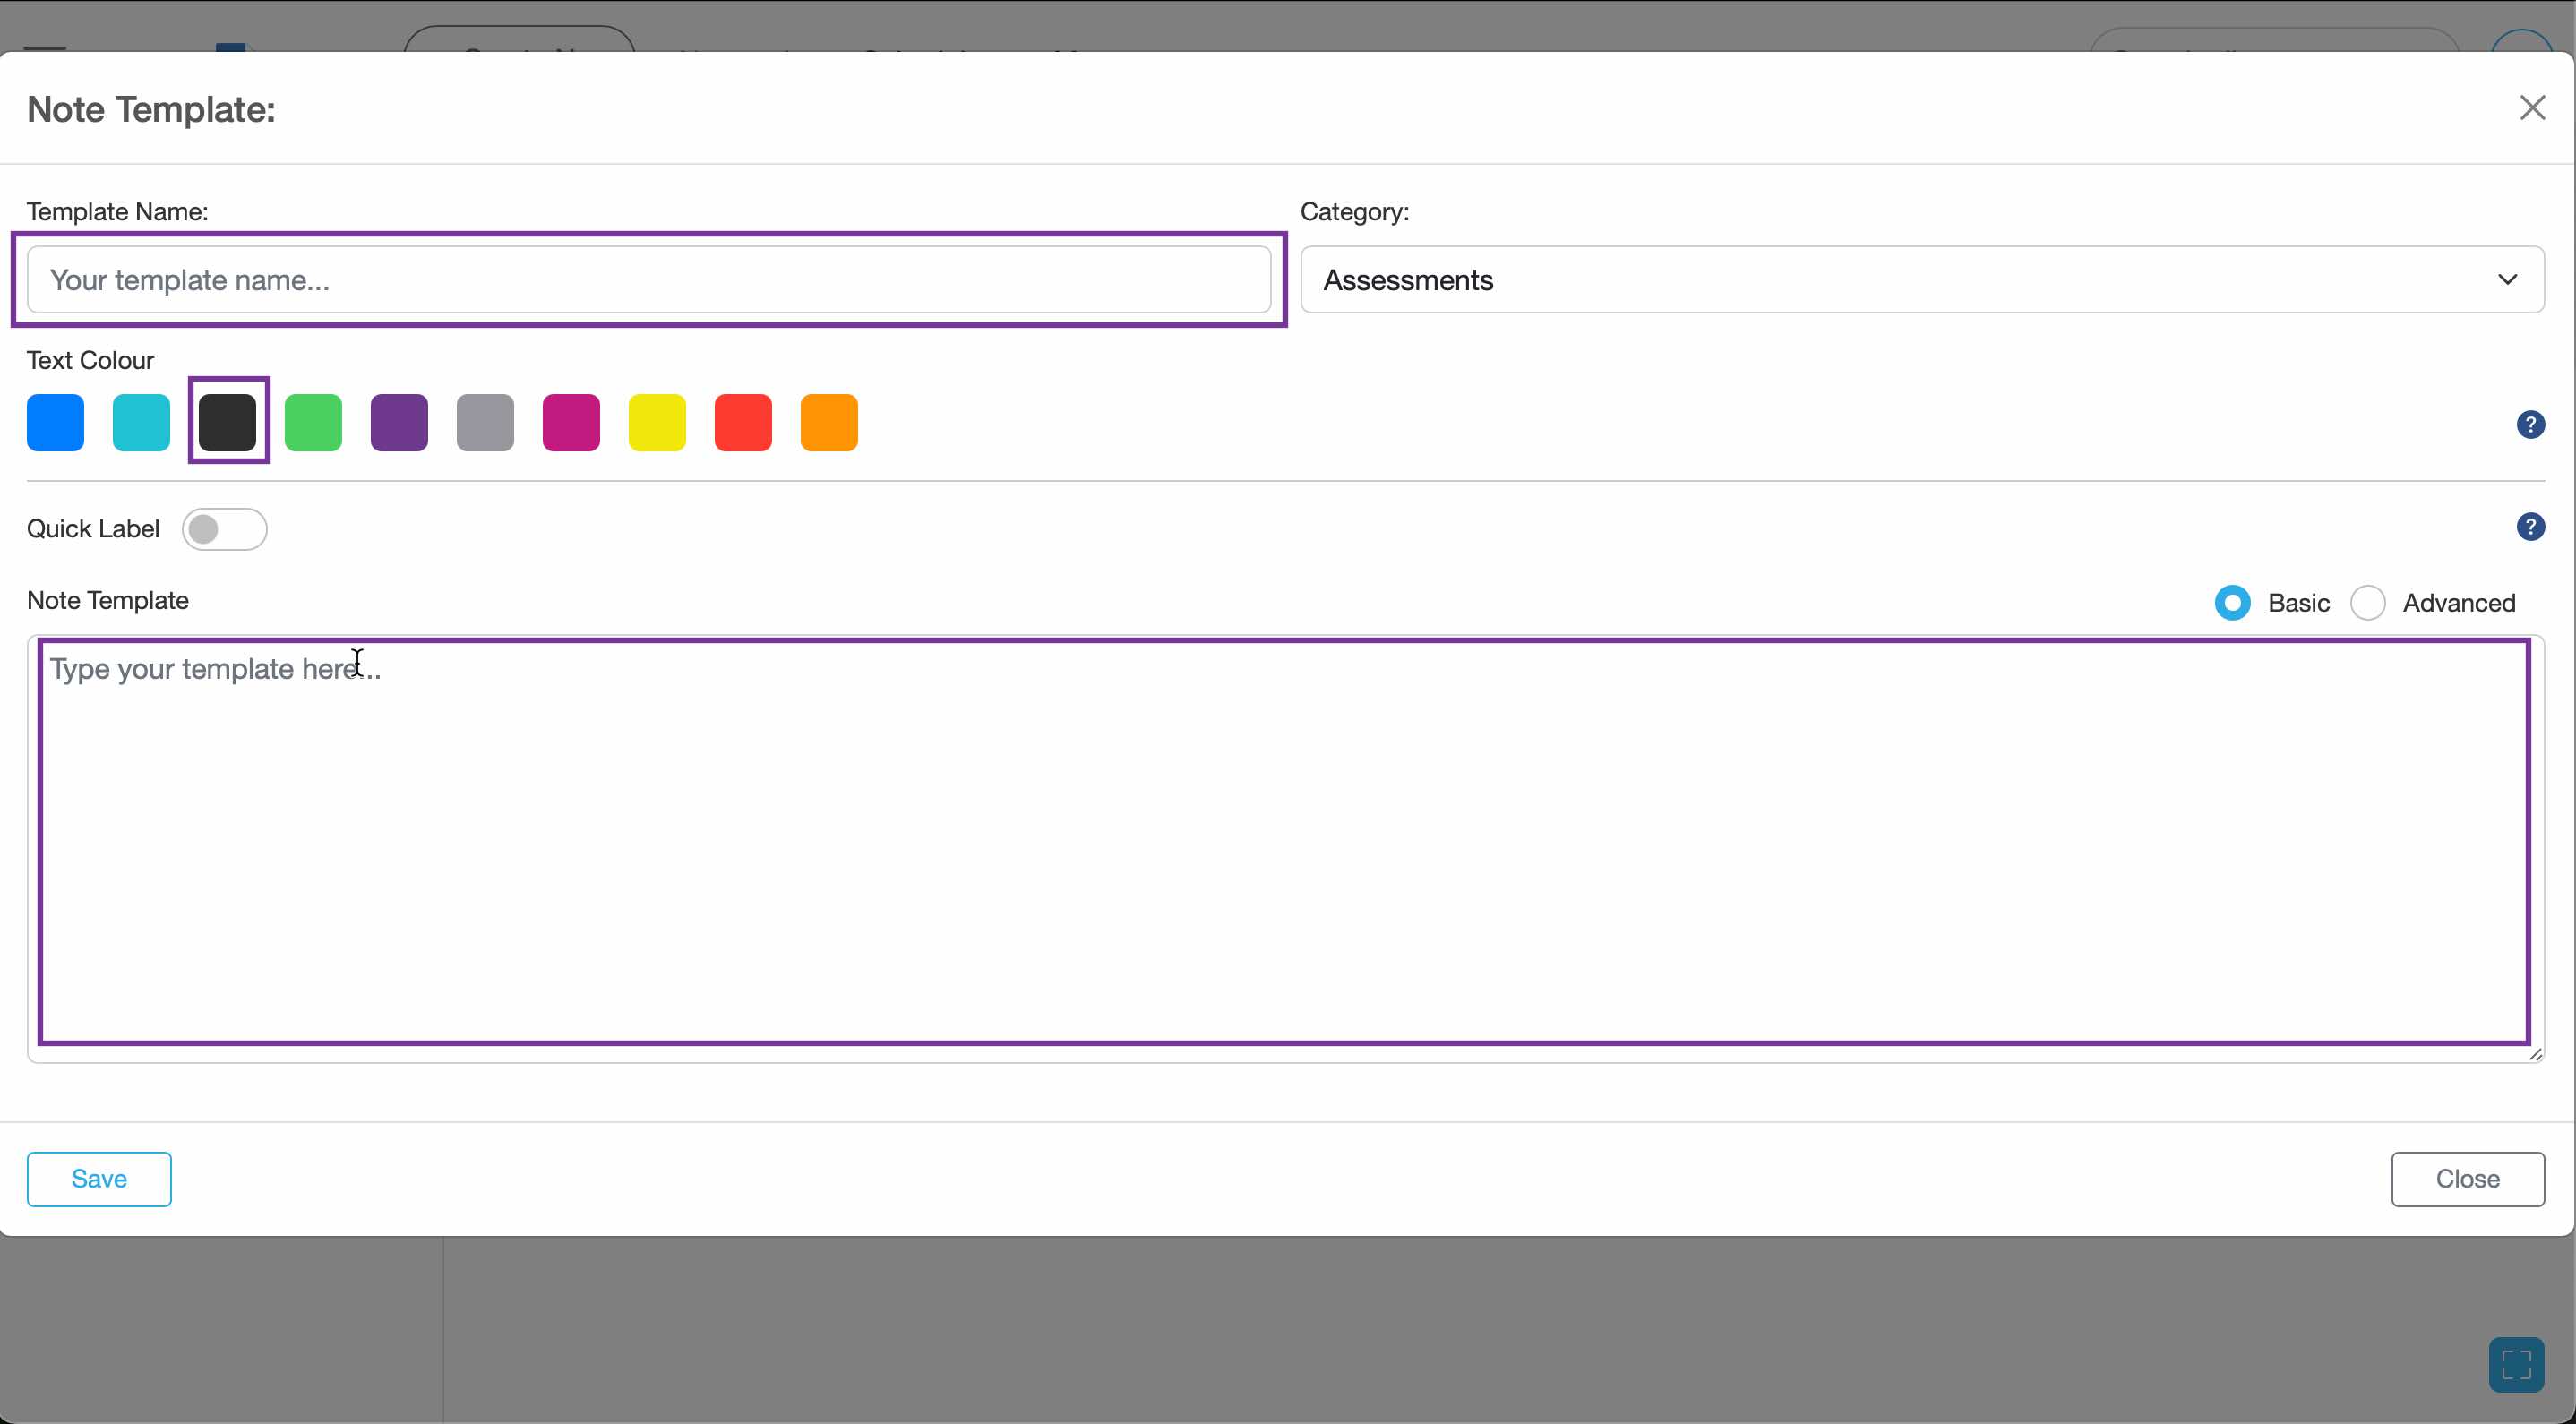
Choose “Basic” to create a plain-text template. - Give your template a short name. By default the template will be put in the Category you currently have open. If you'd rather put it into another Category then select from the dropdown menu.
- Type your note in the text box. Select a colour for the template text by clicking on a coloured square.
- Click save to update your changes.
How to create interactive note templates
Create interactive templates using buttons and dropdown menus quickly using the template builder tool.
-
In the new template window, select Advanced.
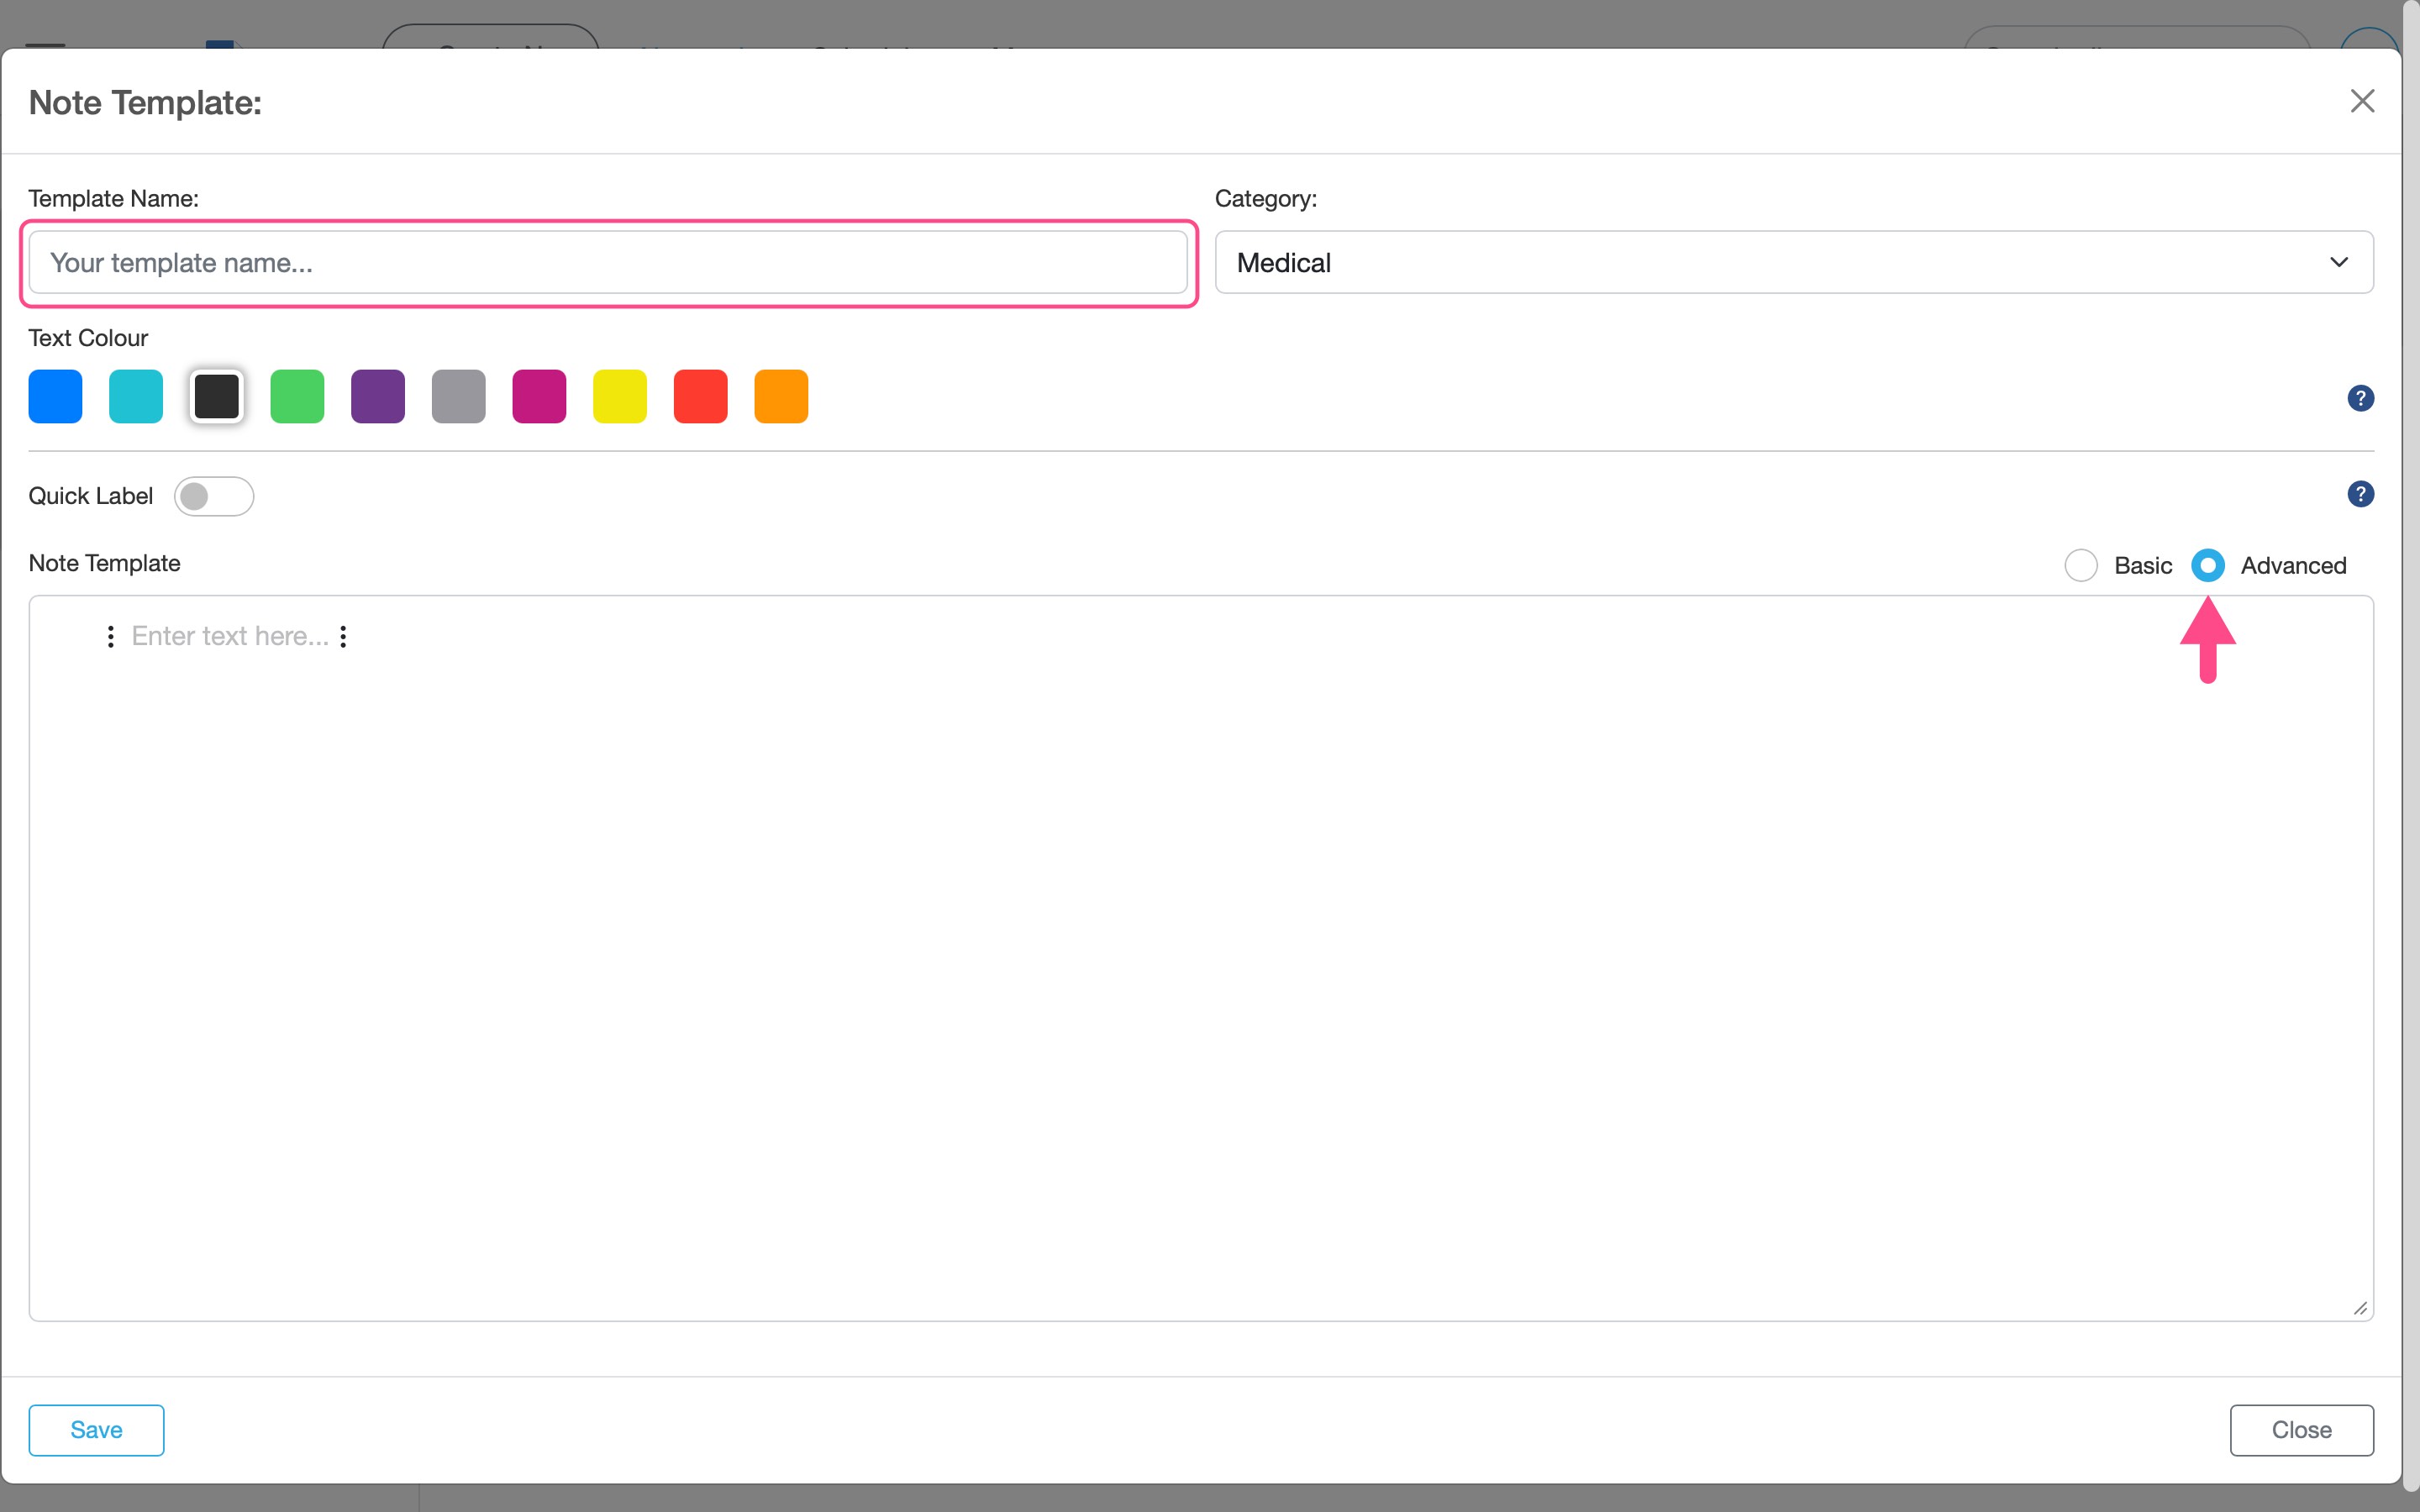
Enter a template name, choose a Category, and select “Advanced” to create an interactive template. - Give your template a short name. By default the template will be put in the Category you have currently selected. If you'd rather put it into another Category then select from the dropdown menu.
-
Open the template builder using the three-dots menu (⋯). Add buttons, dropdowns, or text. Duplicate a line with the copy icon, and reorder lines using the grab handle.
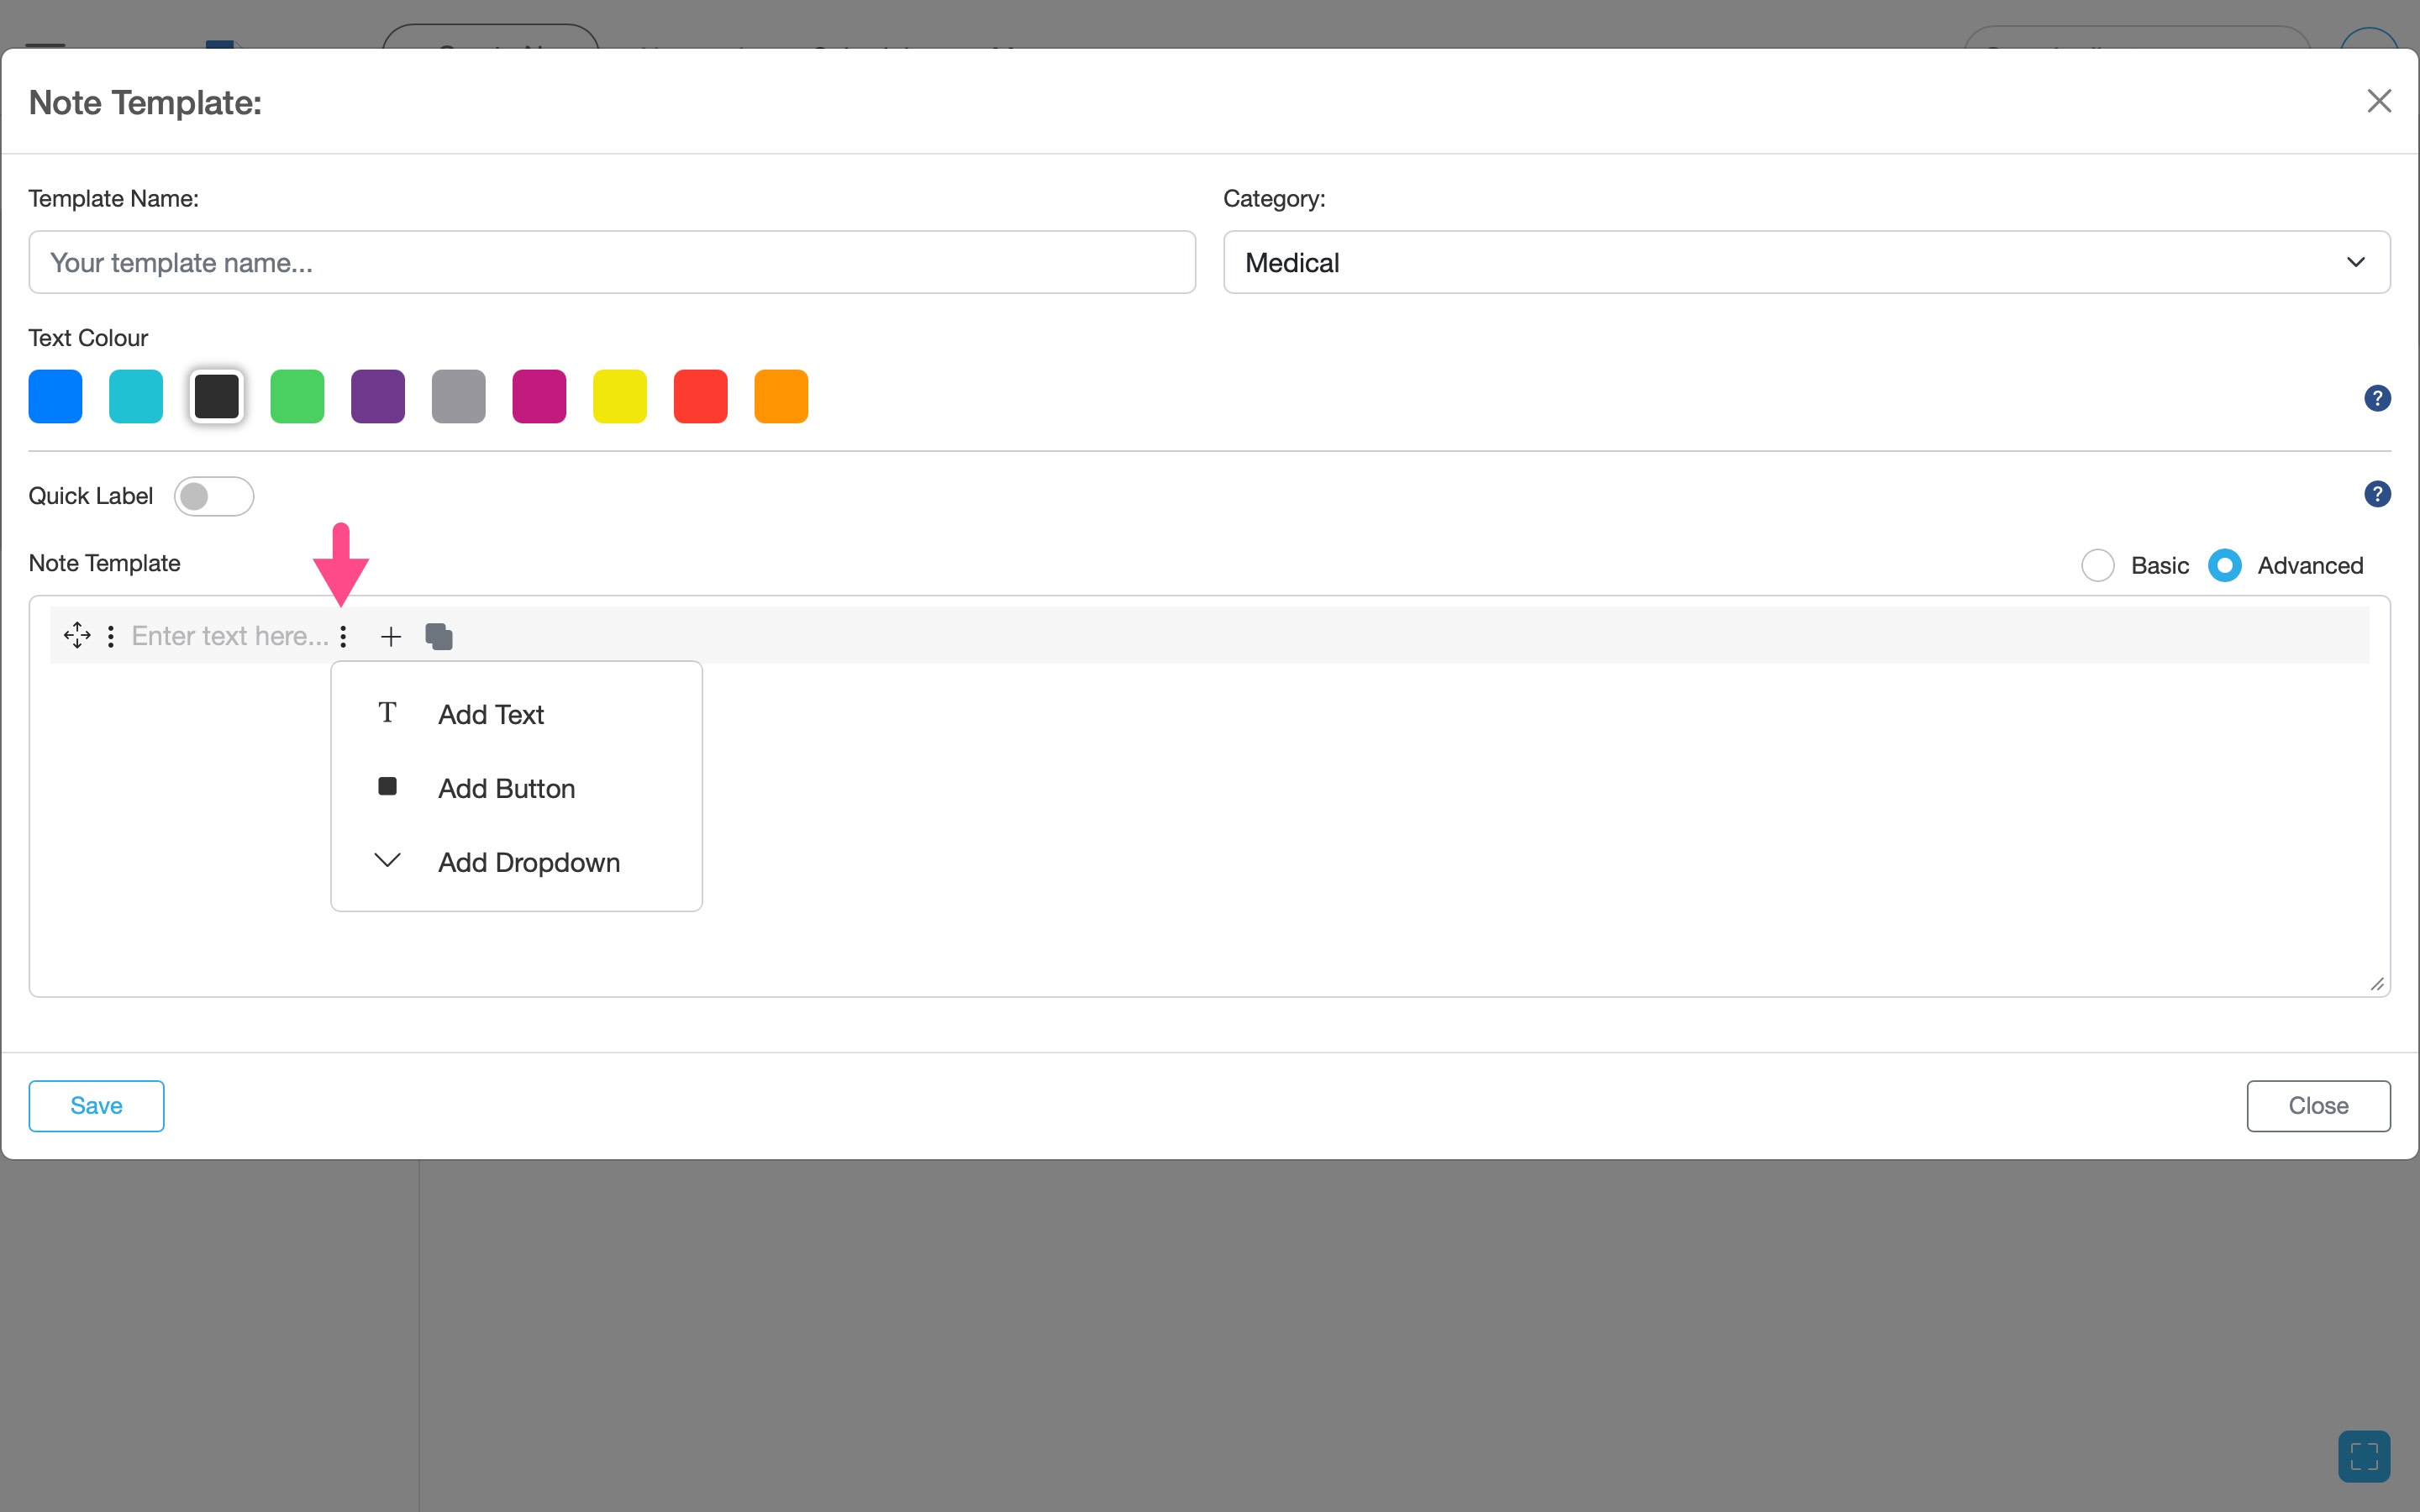
Open the template builder using the three-dots menu (⋯) to add text, buttons, or dropdown fields to your template.
When should I use Advanced?
Use Advanced templates when you want structured responses such as Yes/No questions, frequency scales, or multiple-choice options.
Use Advanced templates when you want structured responses such as Yes/No questions, frequency scales, or multiple-choice options.
Add buttons
You can add multiple buttons (for example Yes or No) or single buttons.
-
Select the Button option from the template tool then click the new button (for example “Button 1”) to rename it and add options.
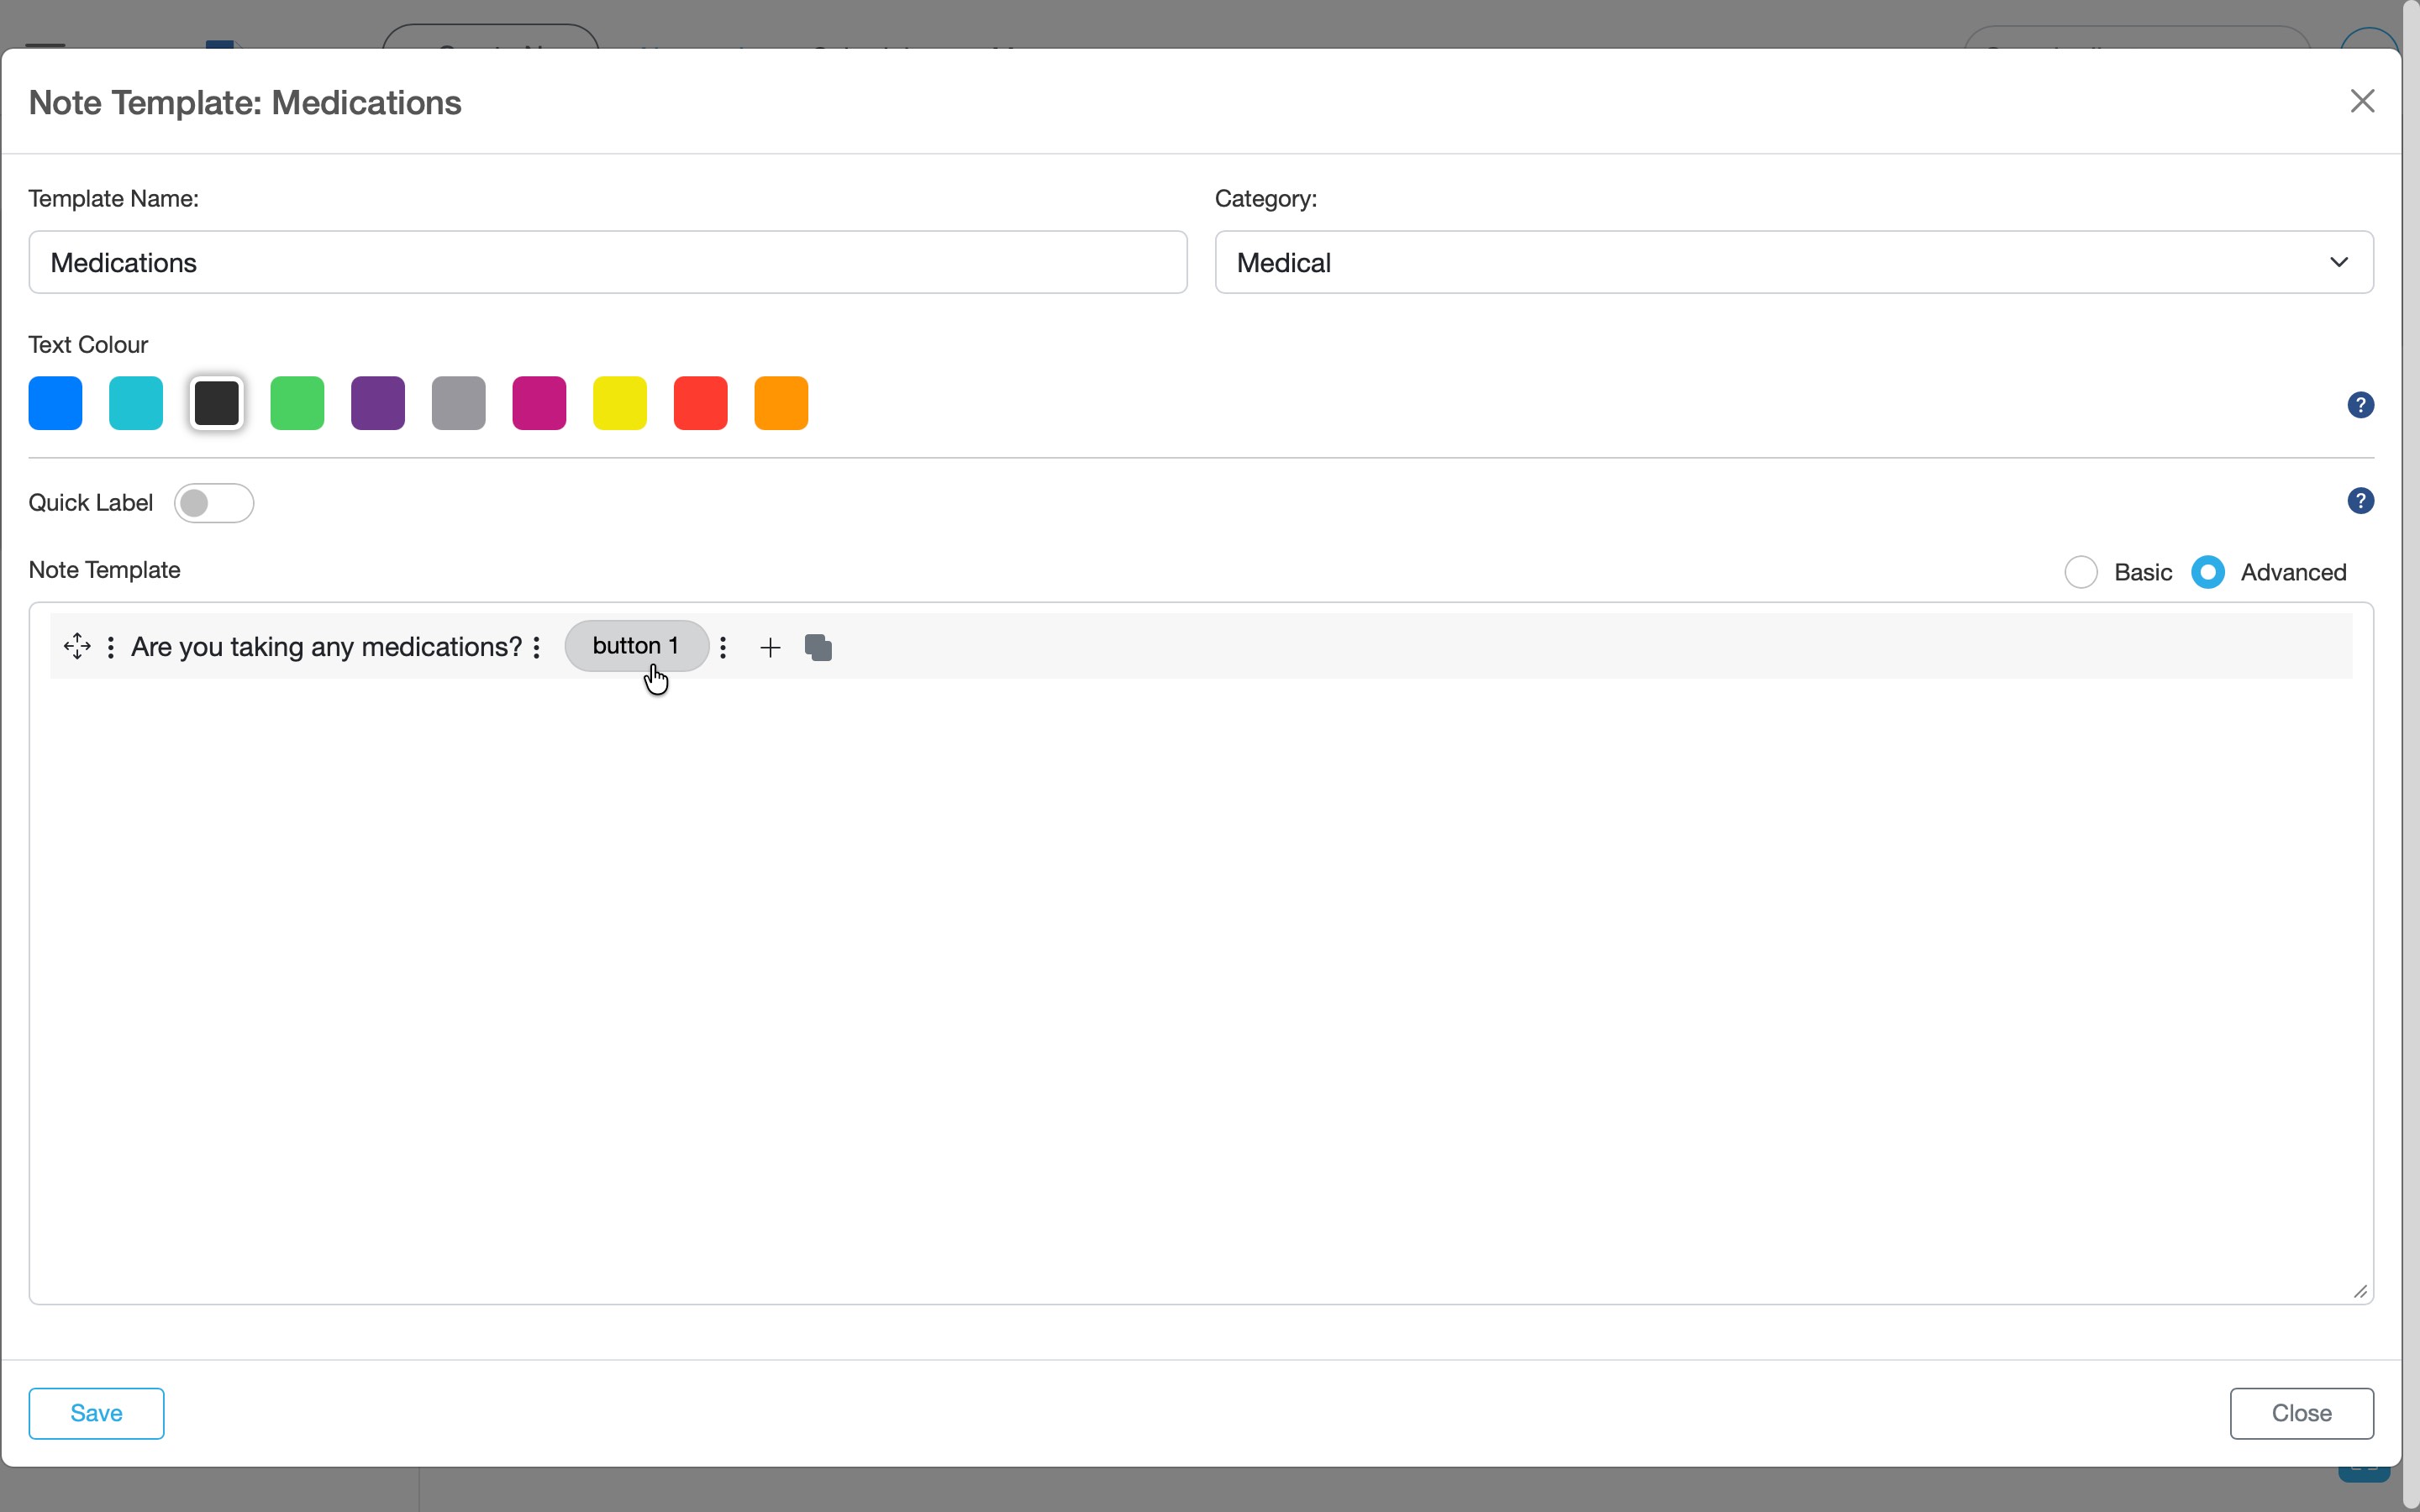
Select “Add Button” to create selectable options such as Yes or No. -
Use the + icon to add additional button options (for example Yes / No). Then click save to update your changes.
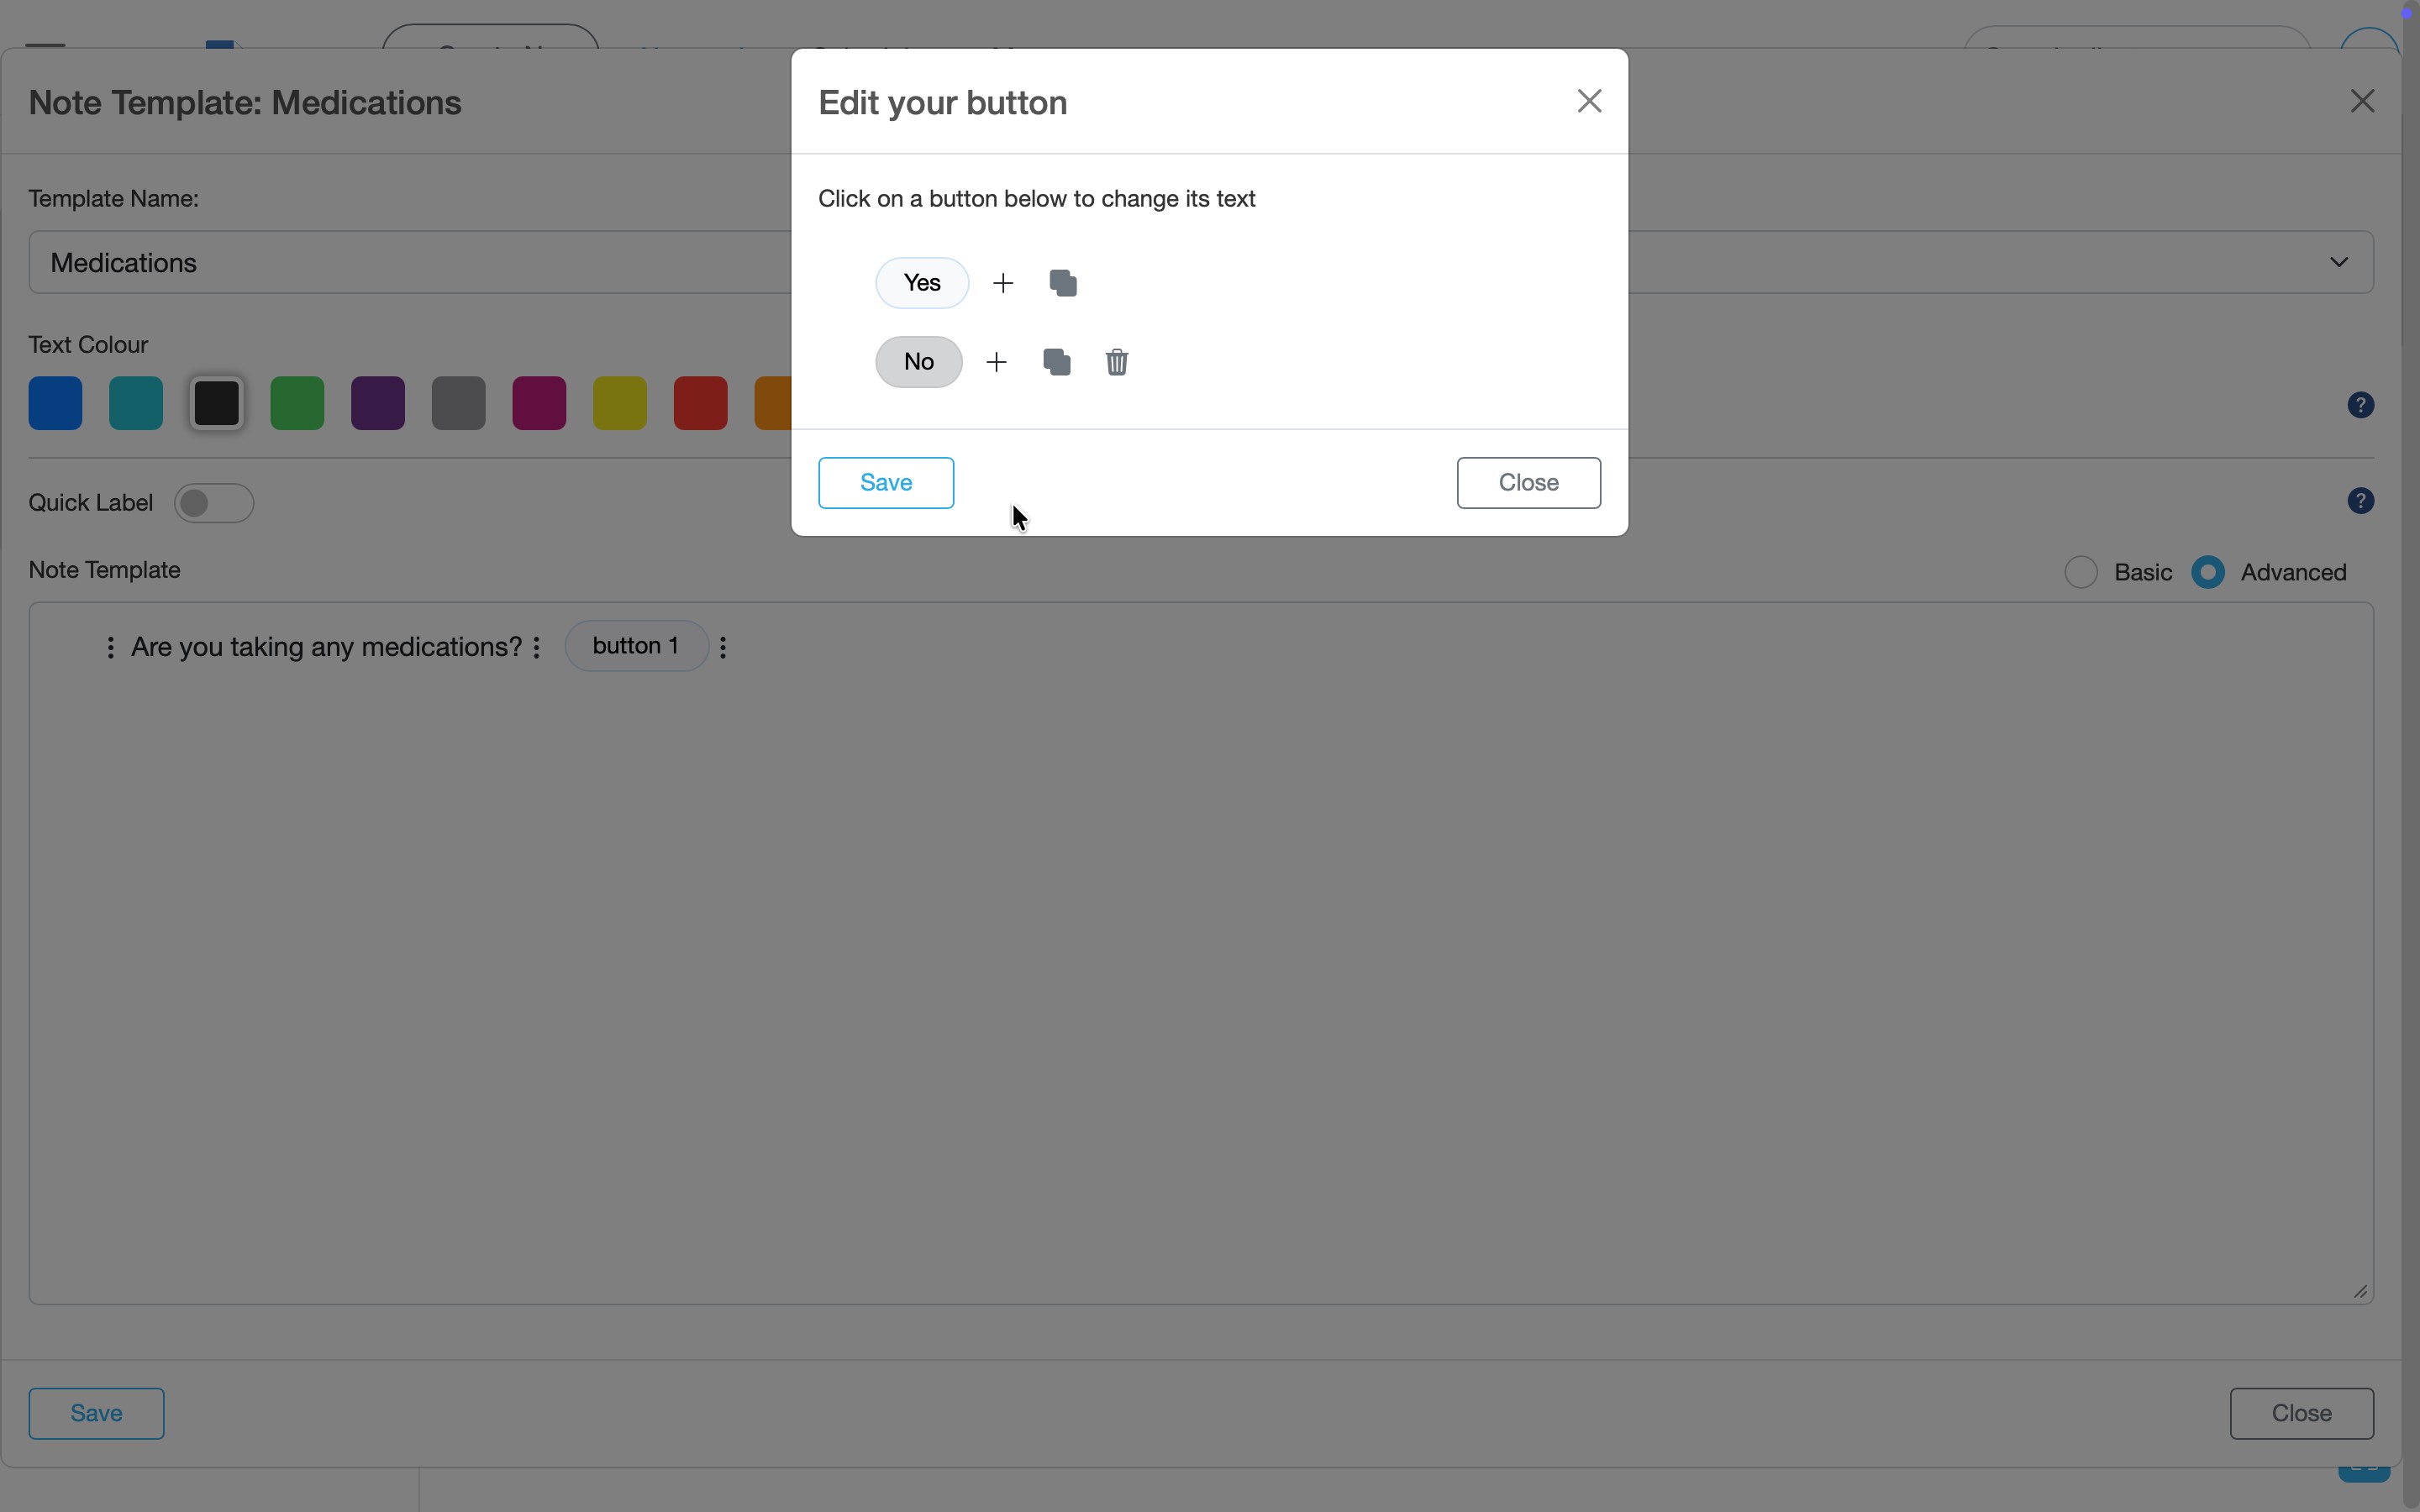
Click on a button to rename it. Use the icons to duplicate or delete options. -
Click the Save button to finish.
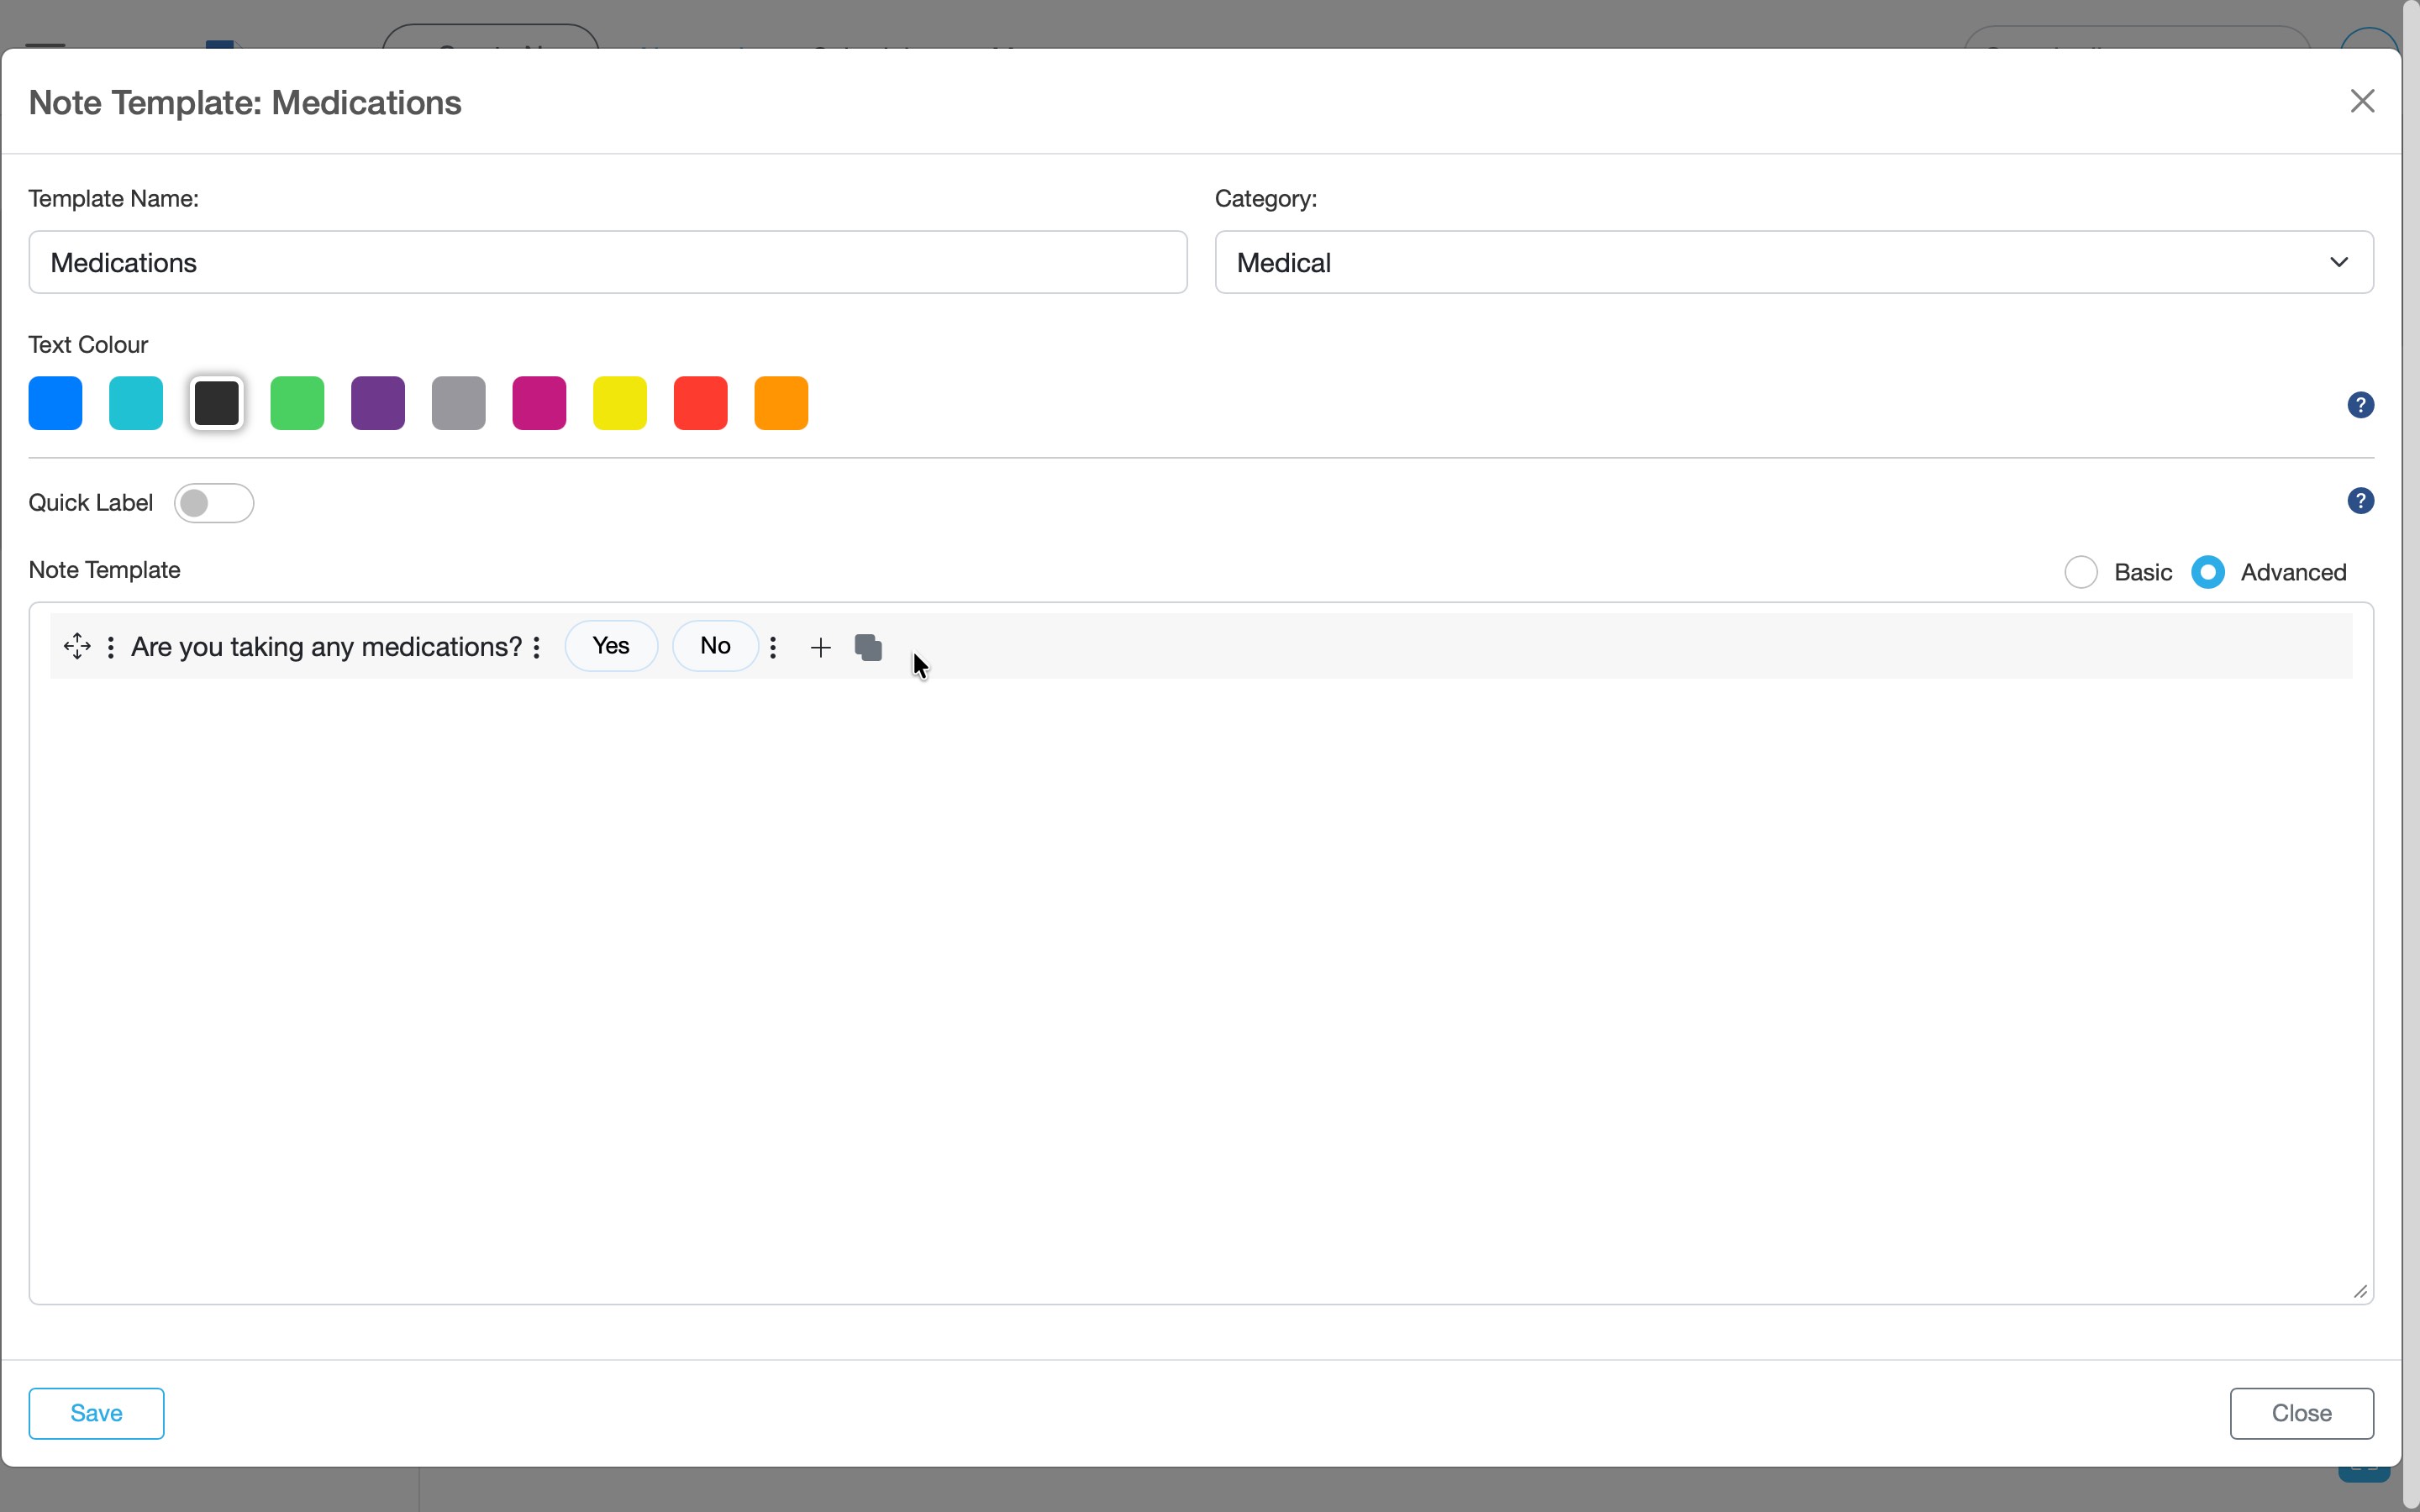
Buttons appear directly in your template and can be selected when writing a note.
Add dropdowns
Create multiple-choice options in a dropdown and add them to your note template.
-
Open the template builder using the three-dots menu (⋯) and select Add dropdown.
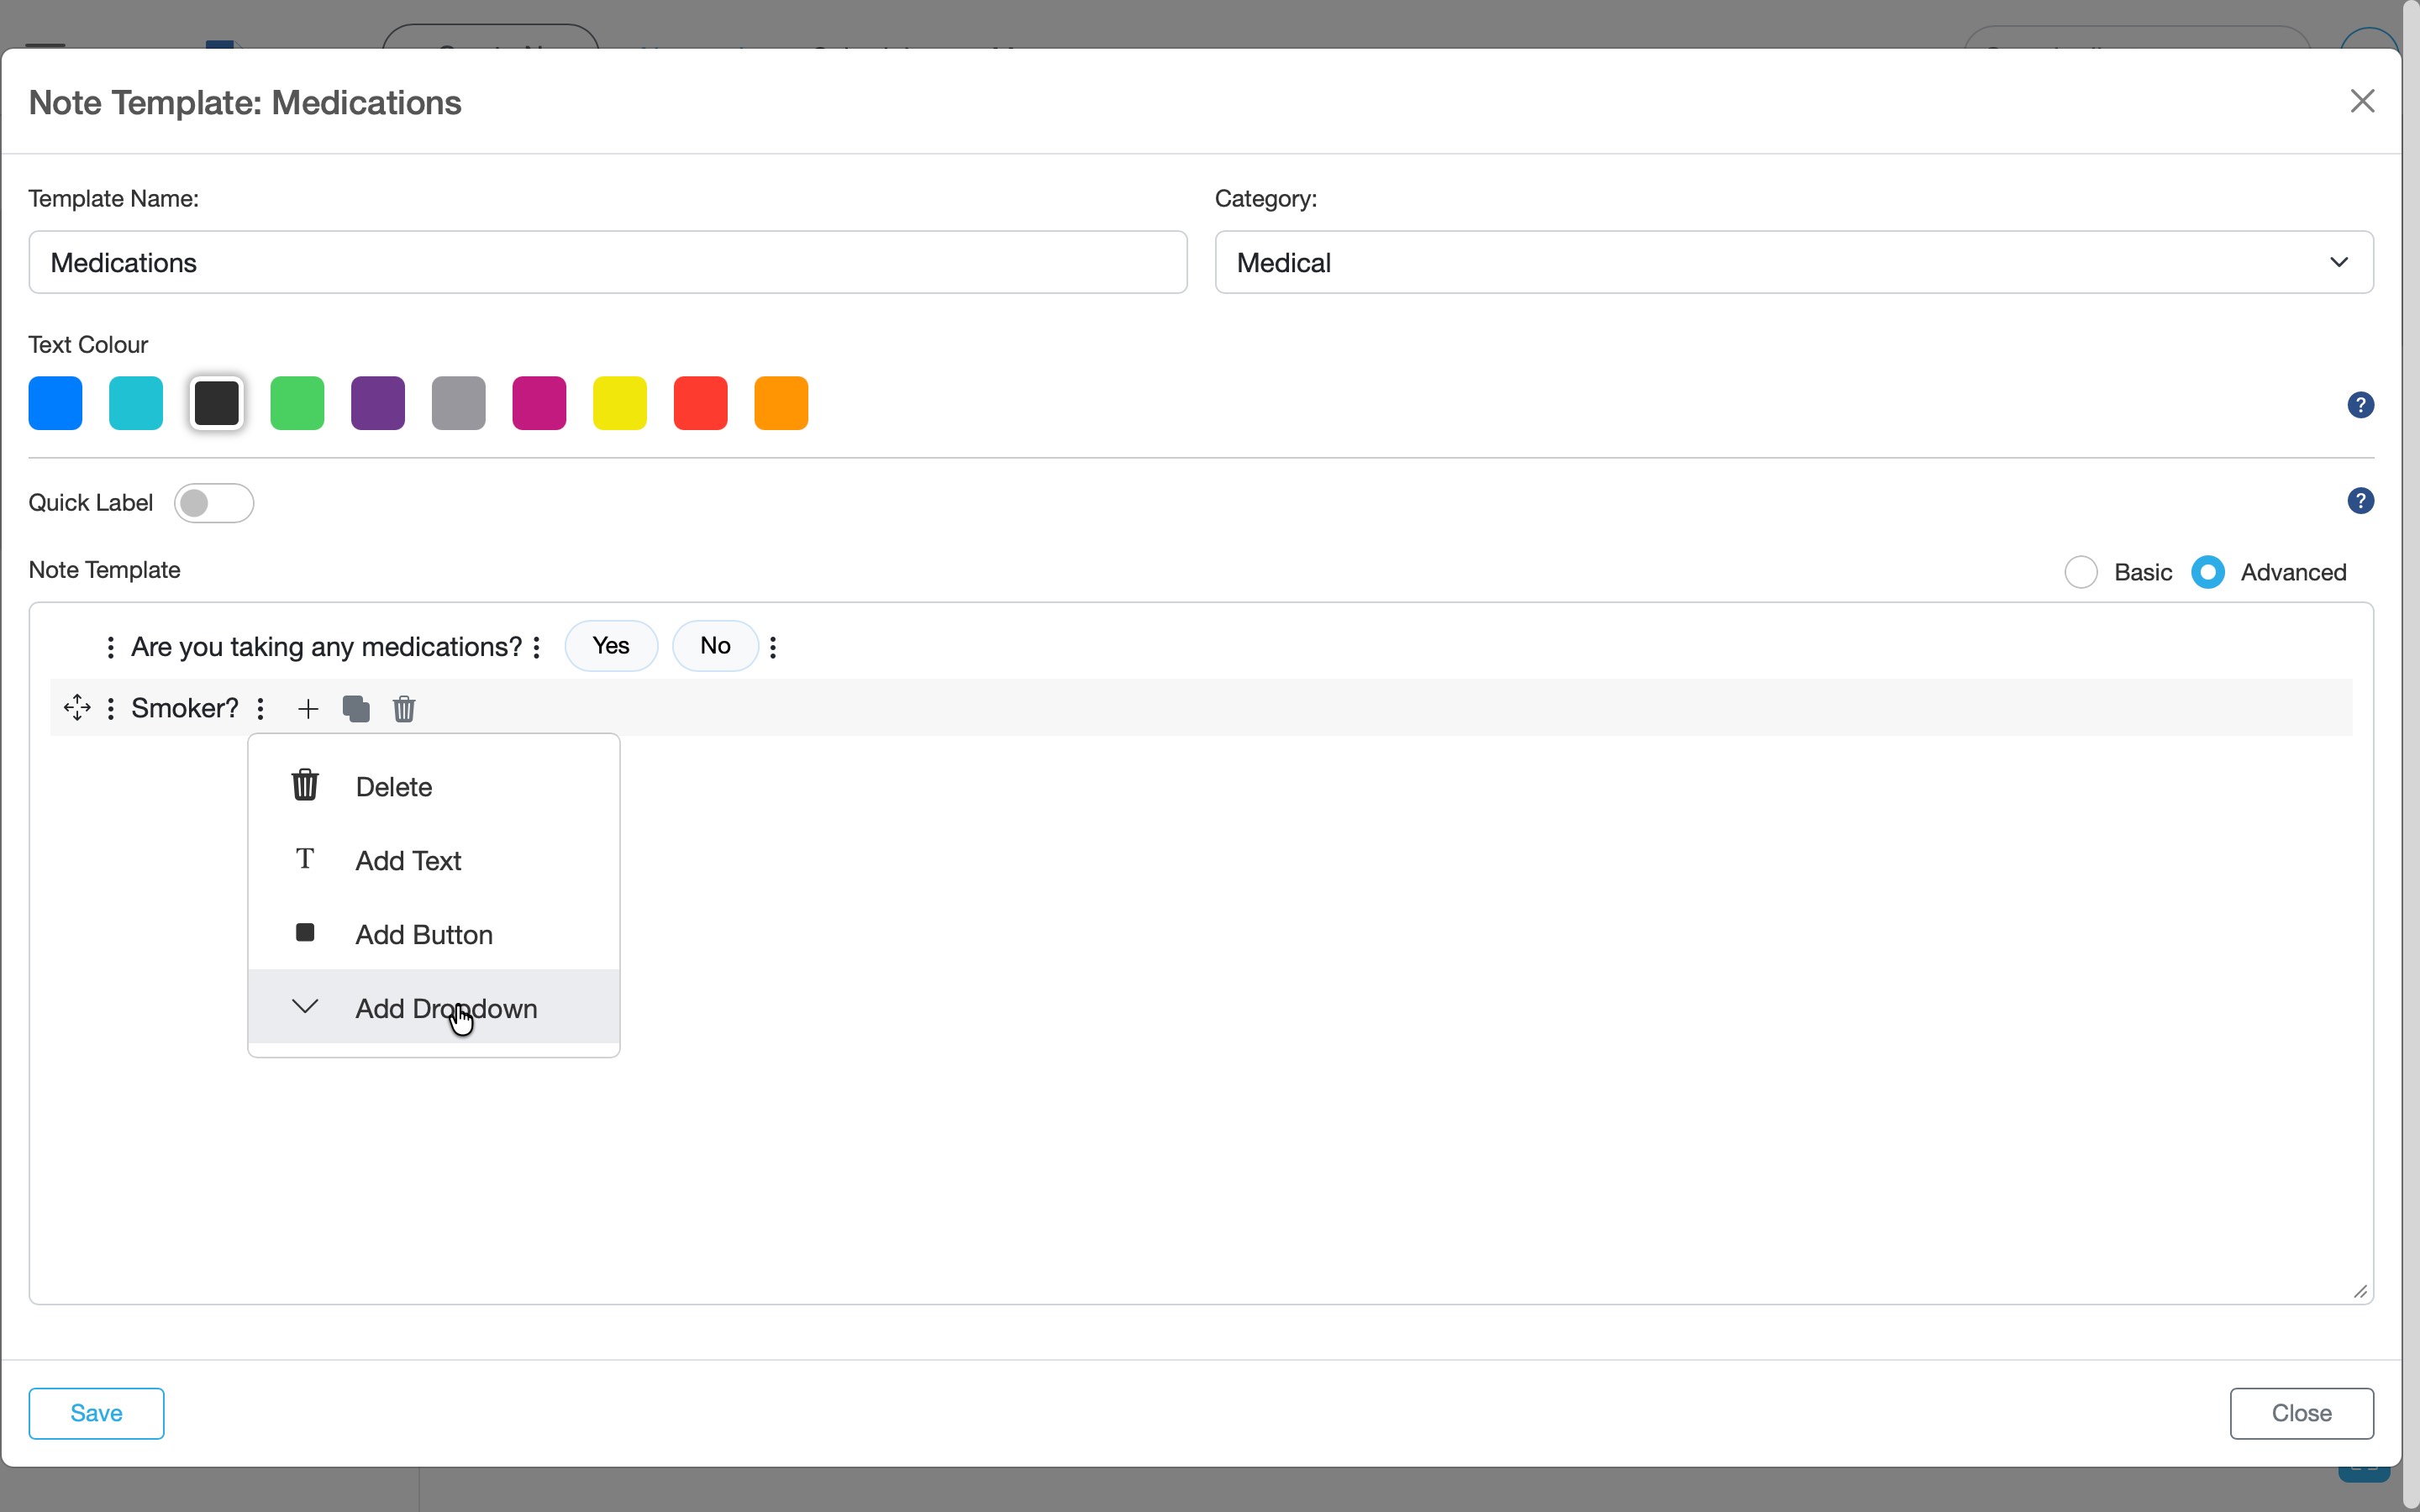
Choose “Add dropdown” to create a multiple-choice selection field. -
Use the + icon to add options. Then click Save to update your changes.
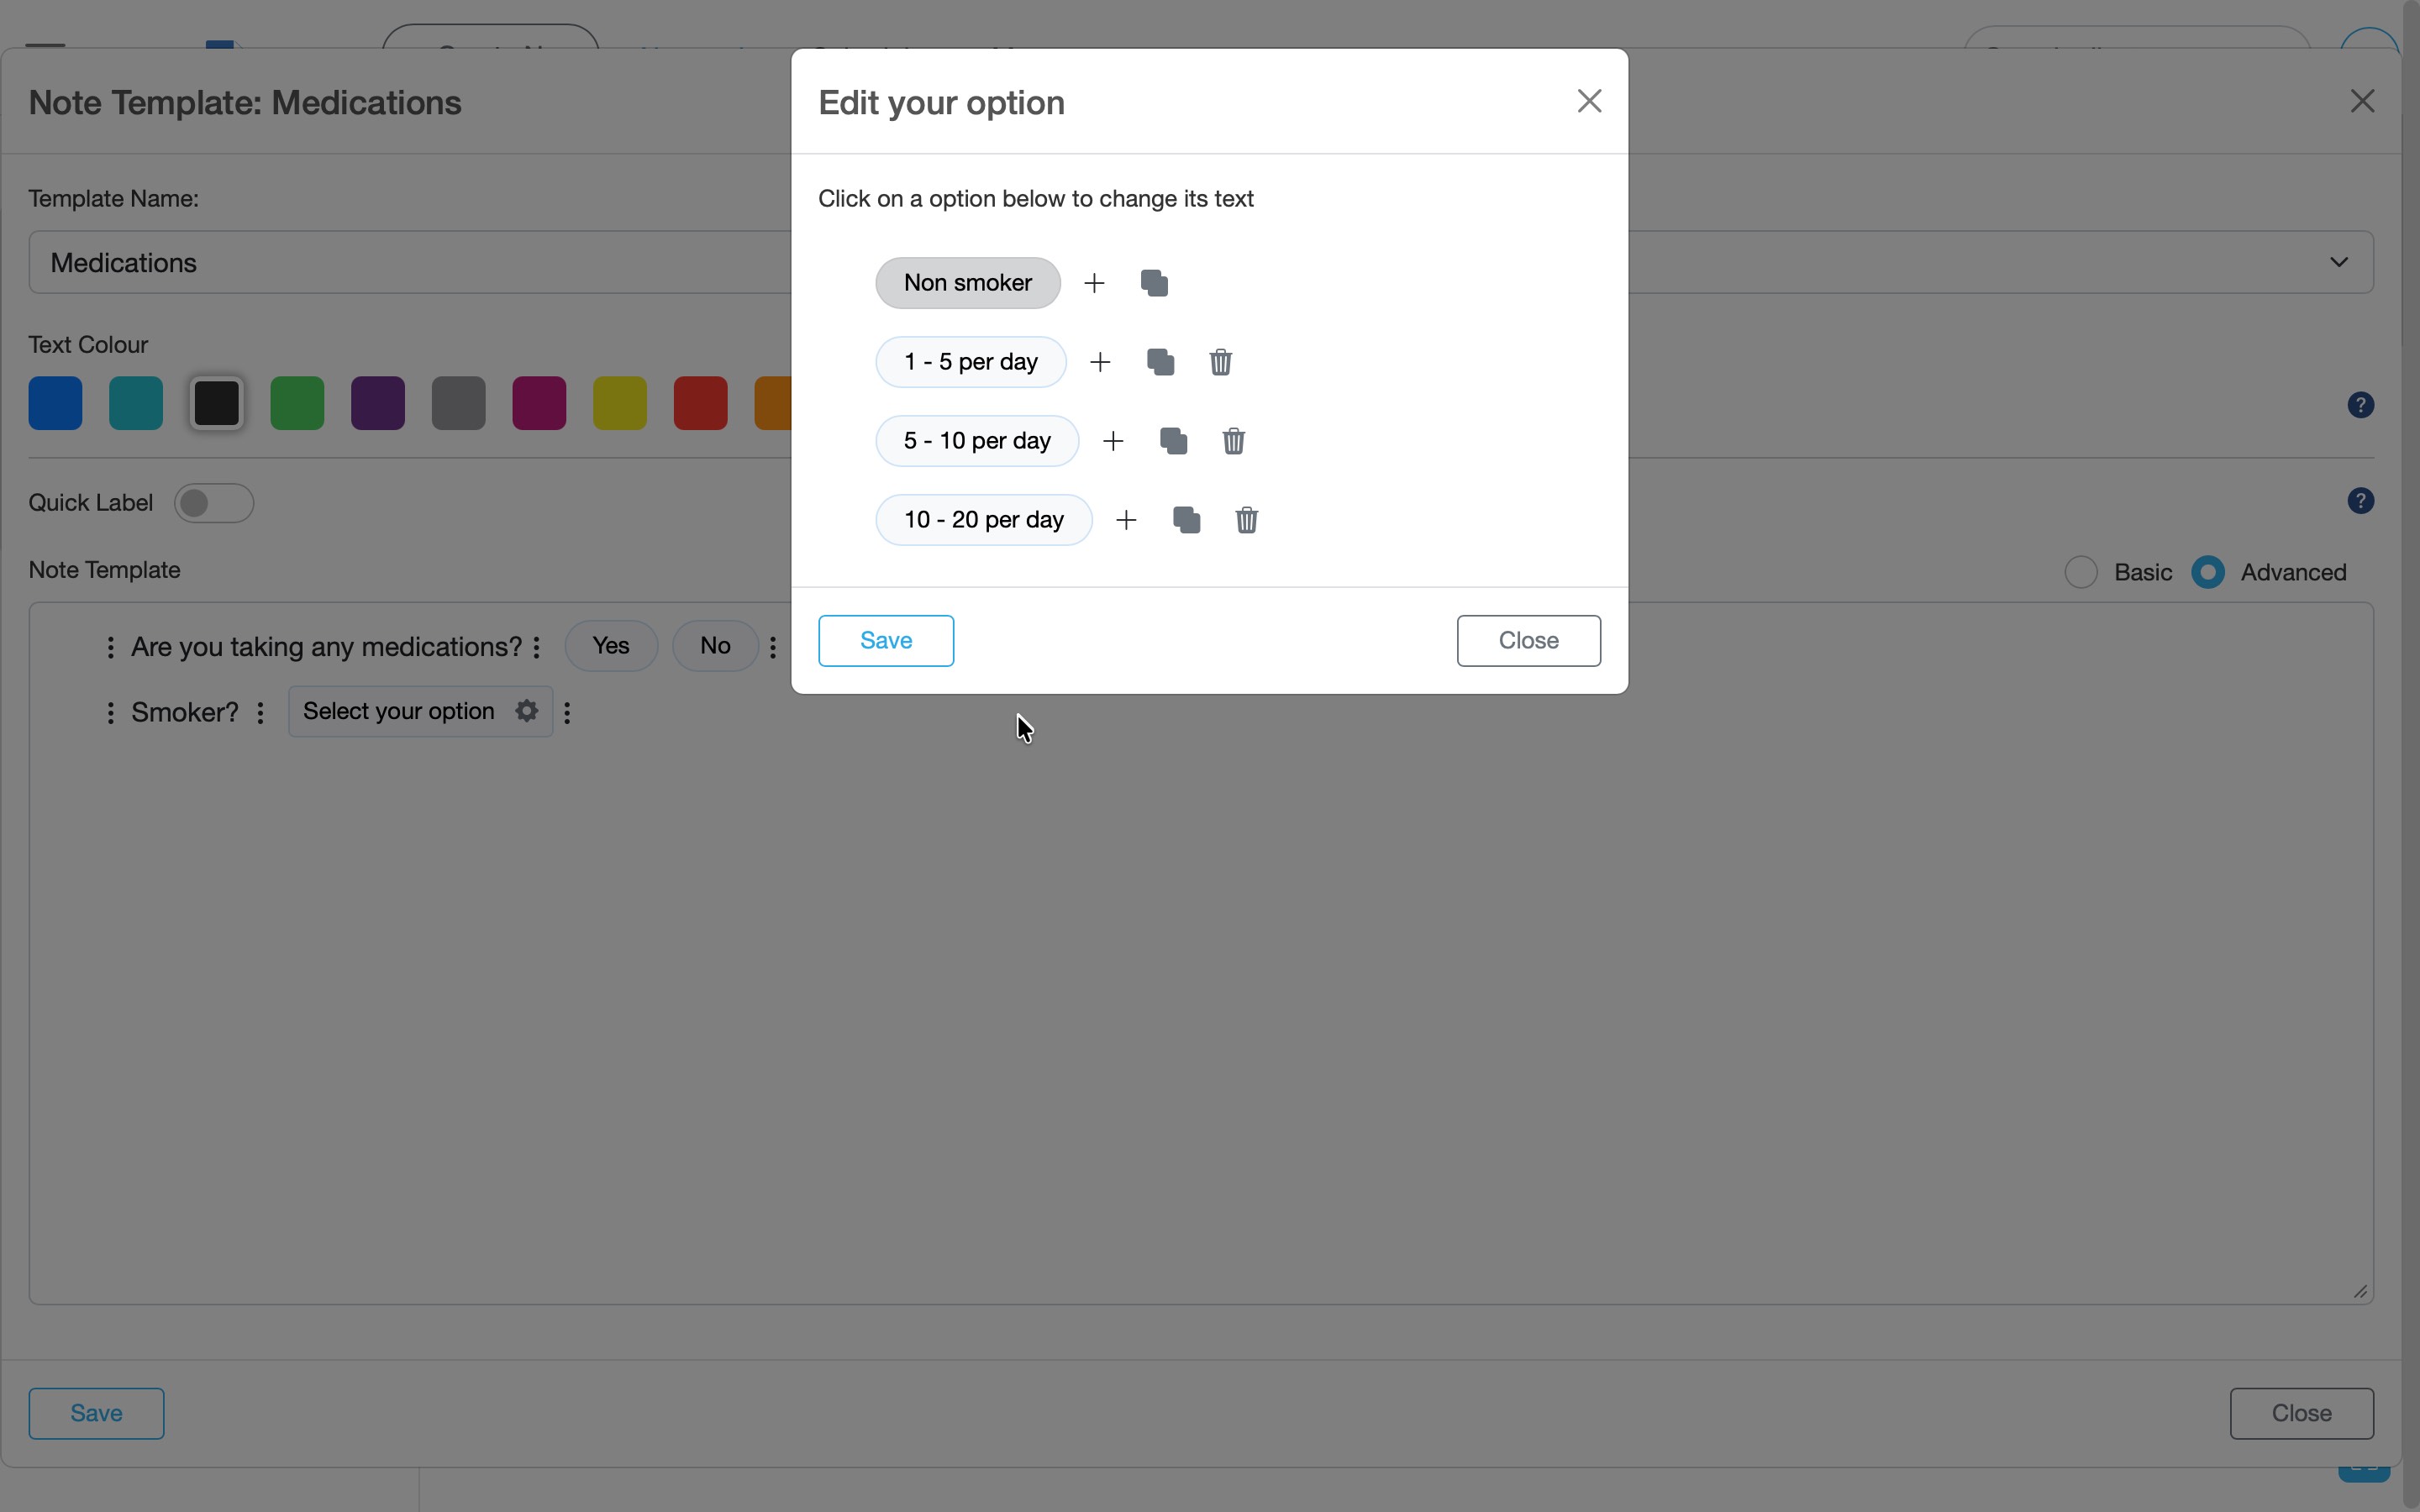
Add or edit dropdown options using the + icon, then click Save. -
Click the Save button to finish.
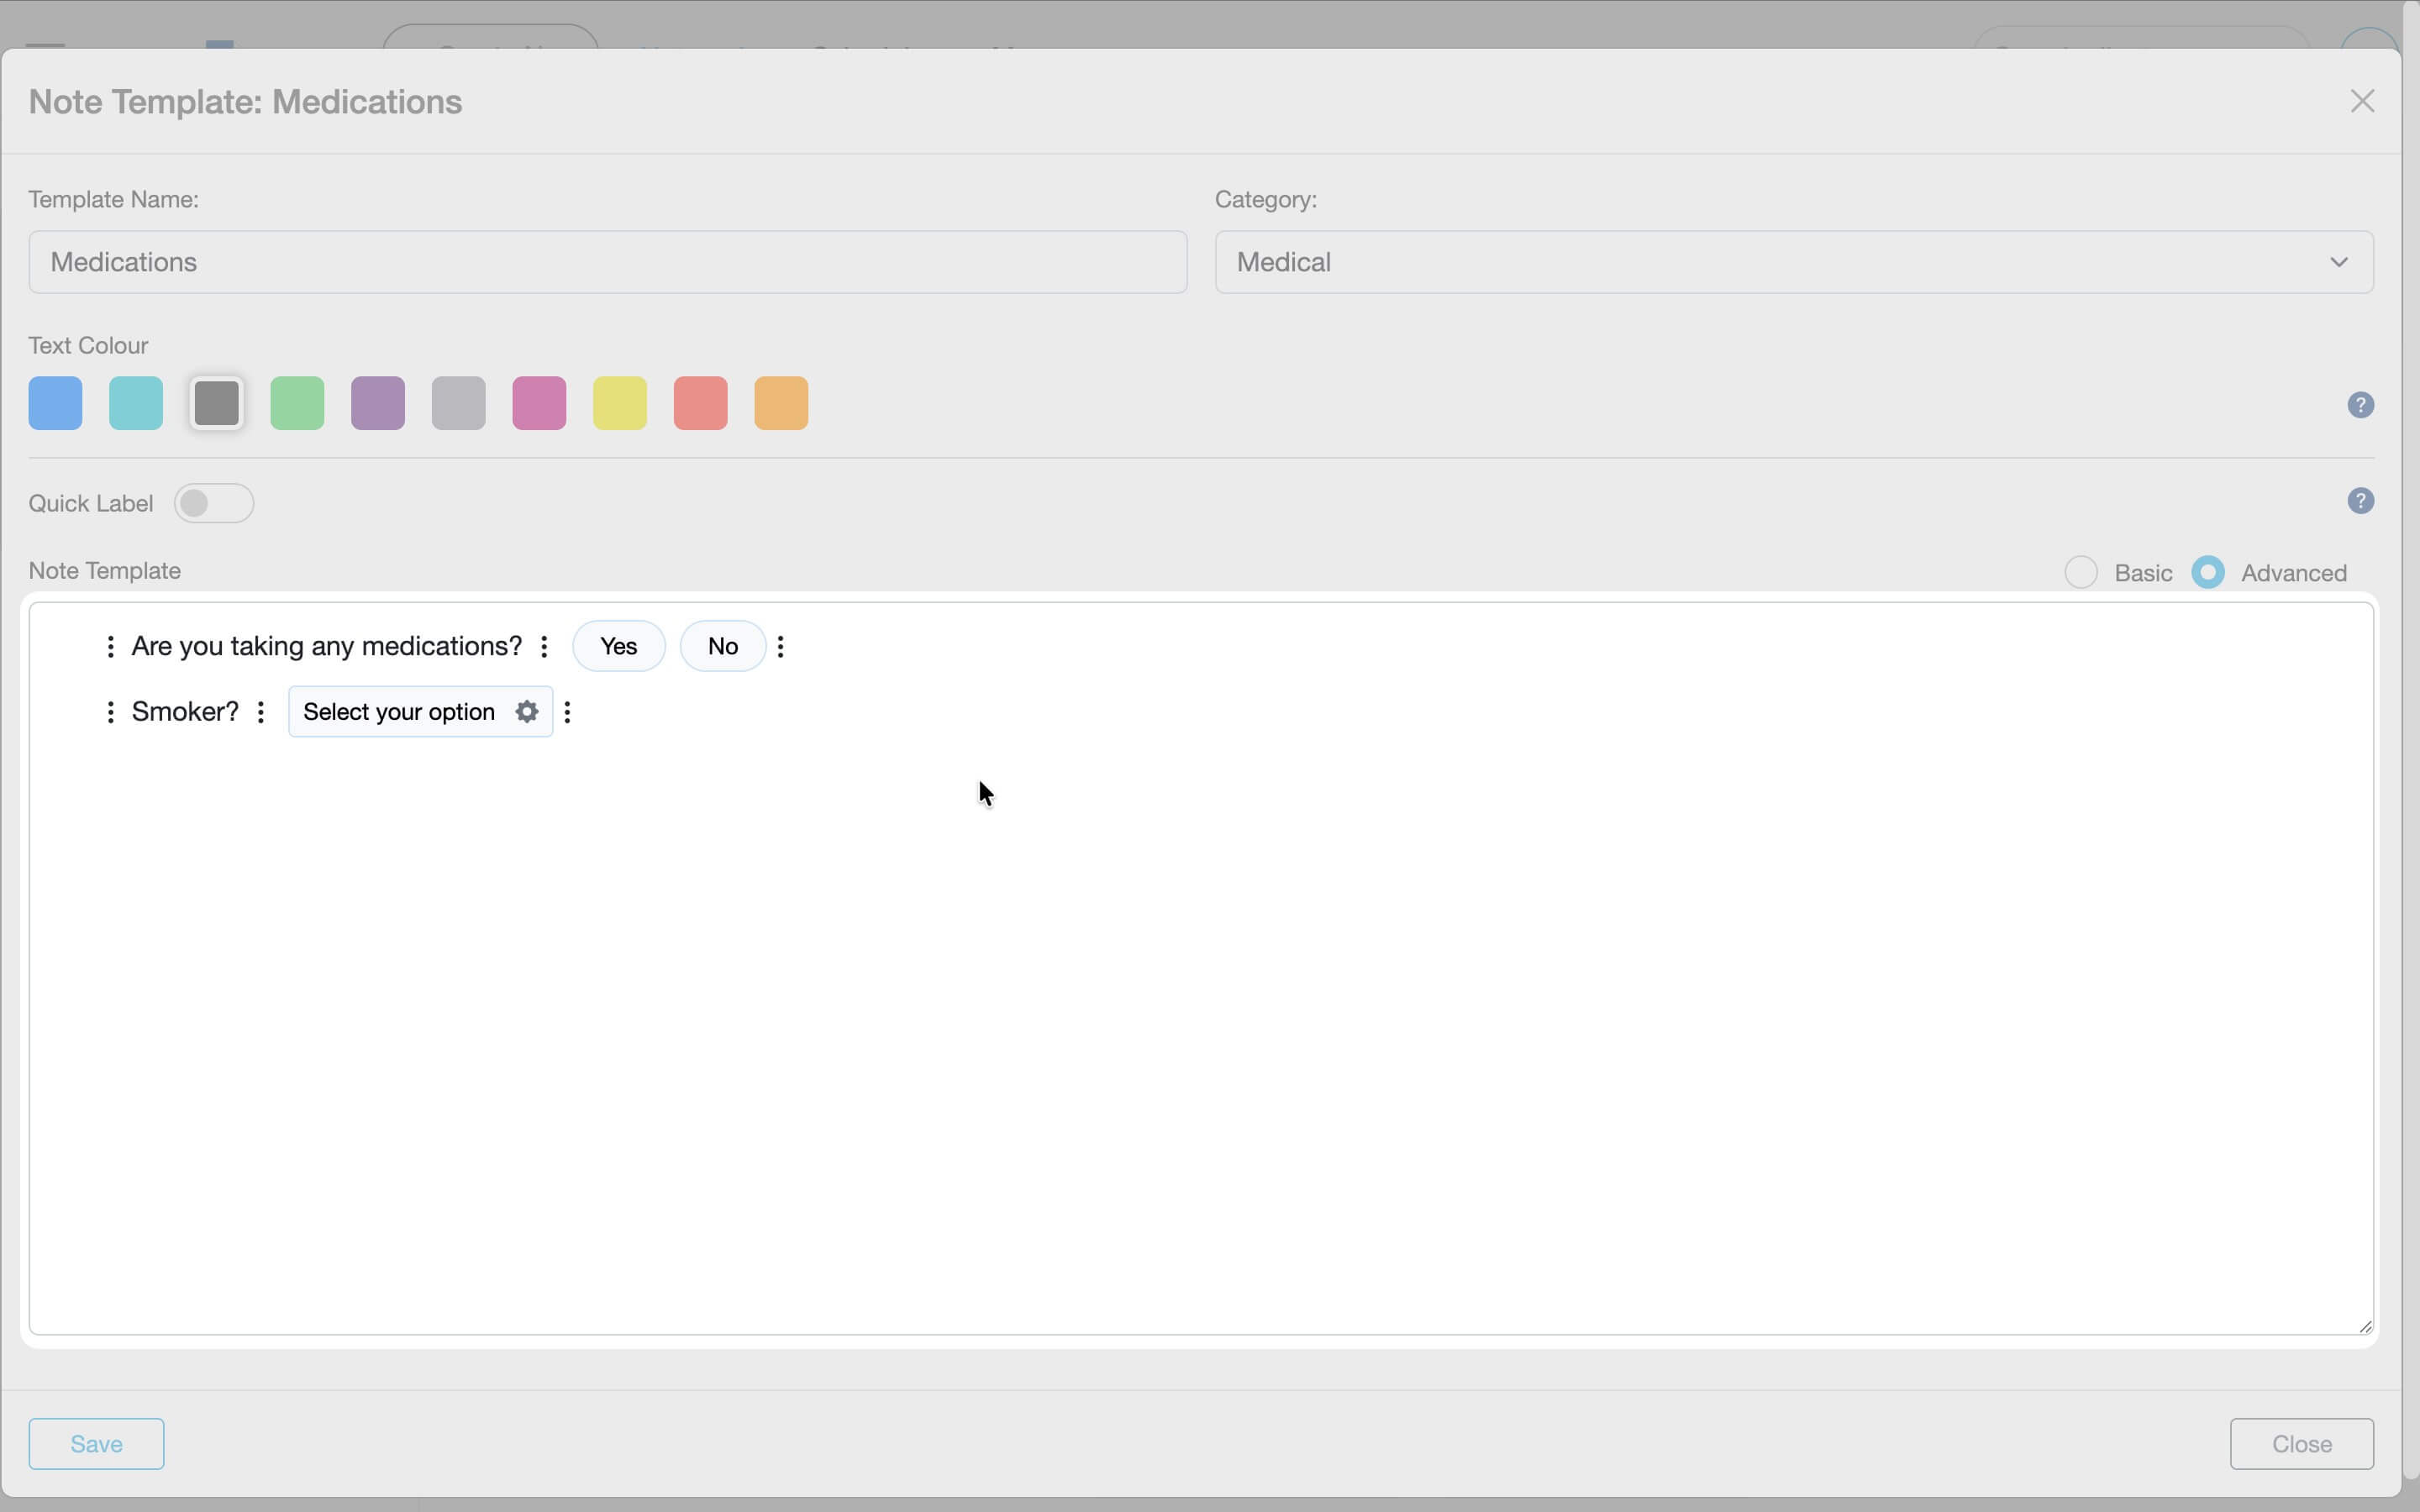
Your interactive fields appear inside the template editor, including buttons and dropdown selections. -
Here's what the finished template looks like in use:
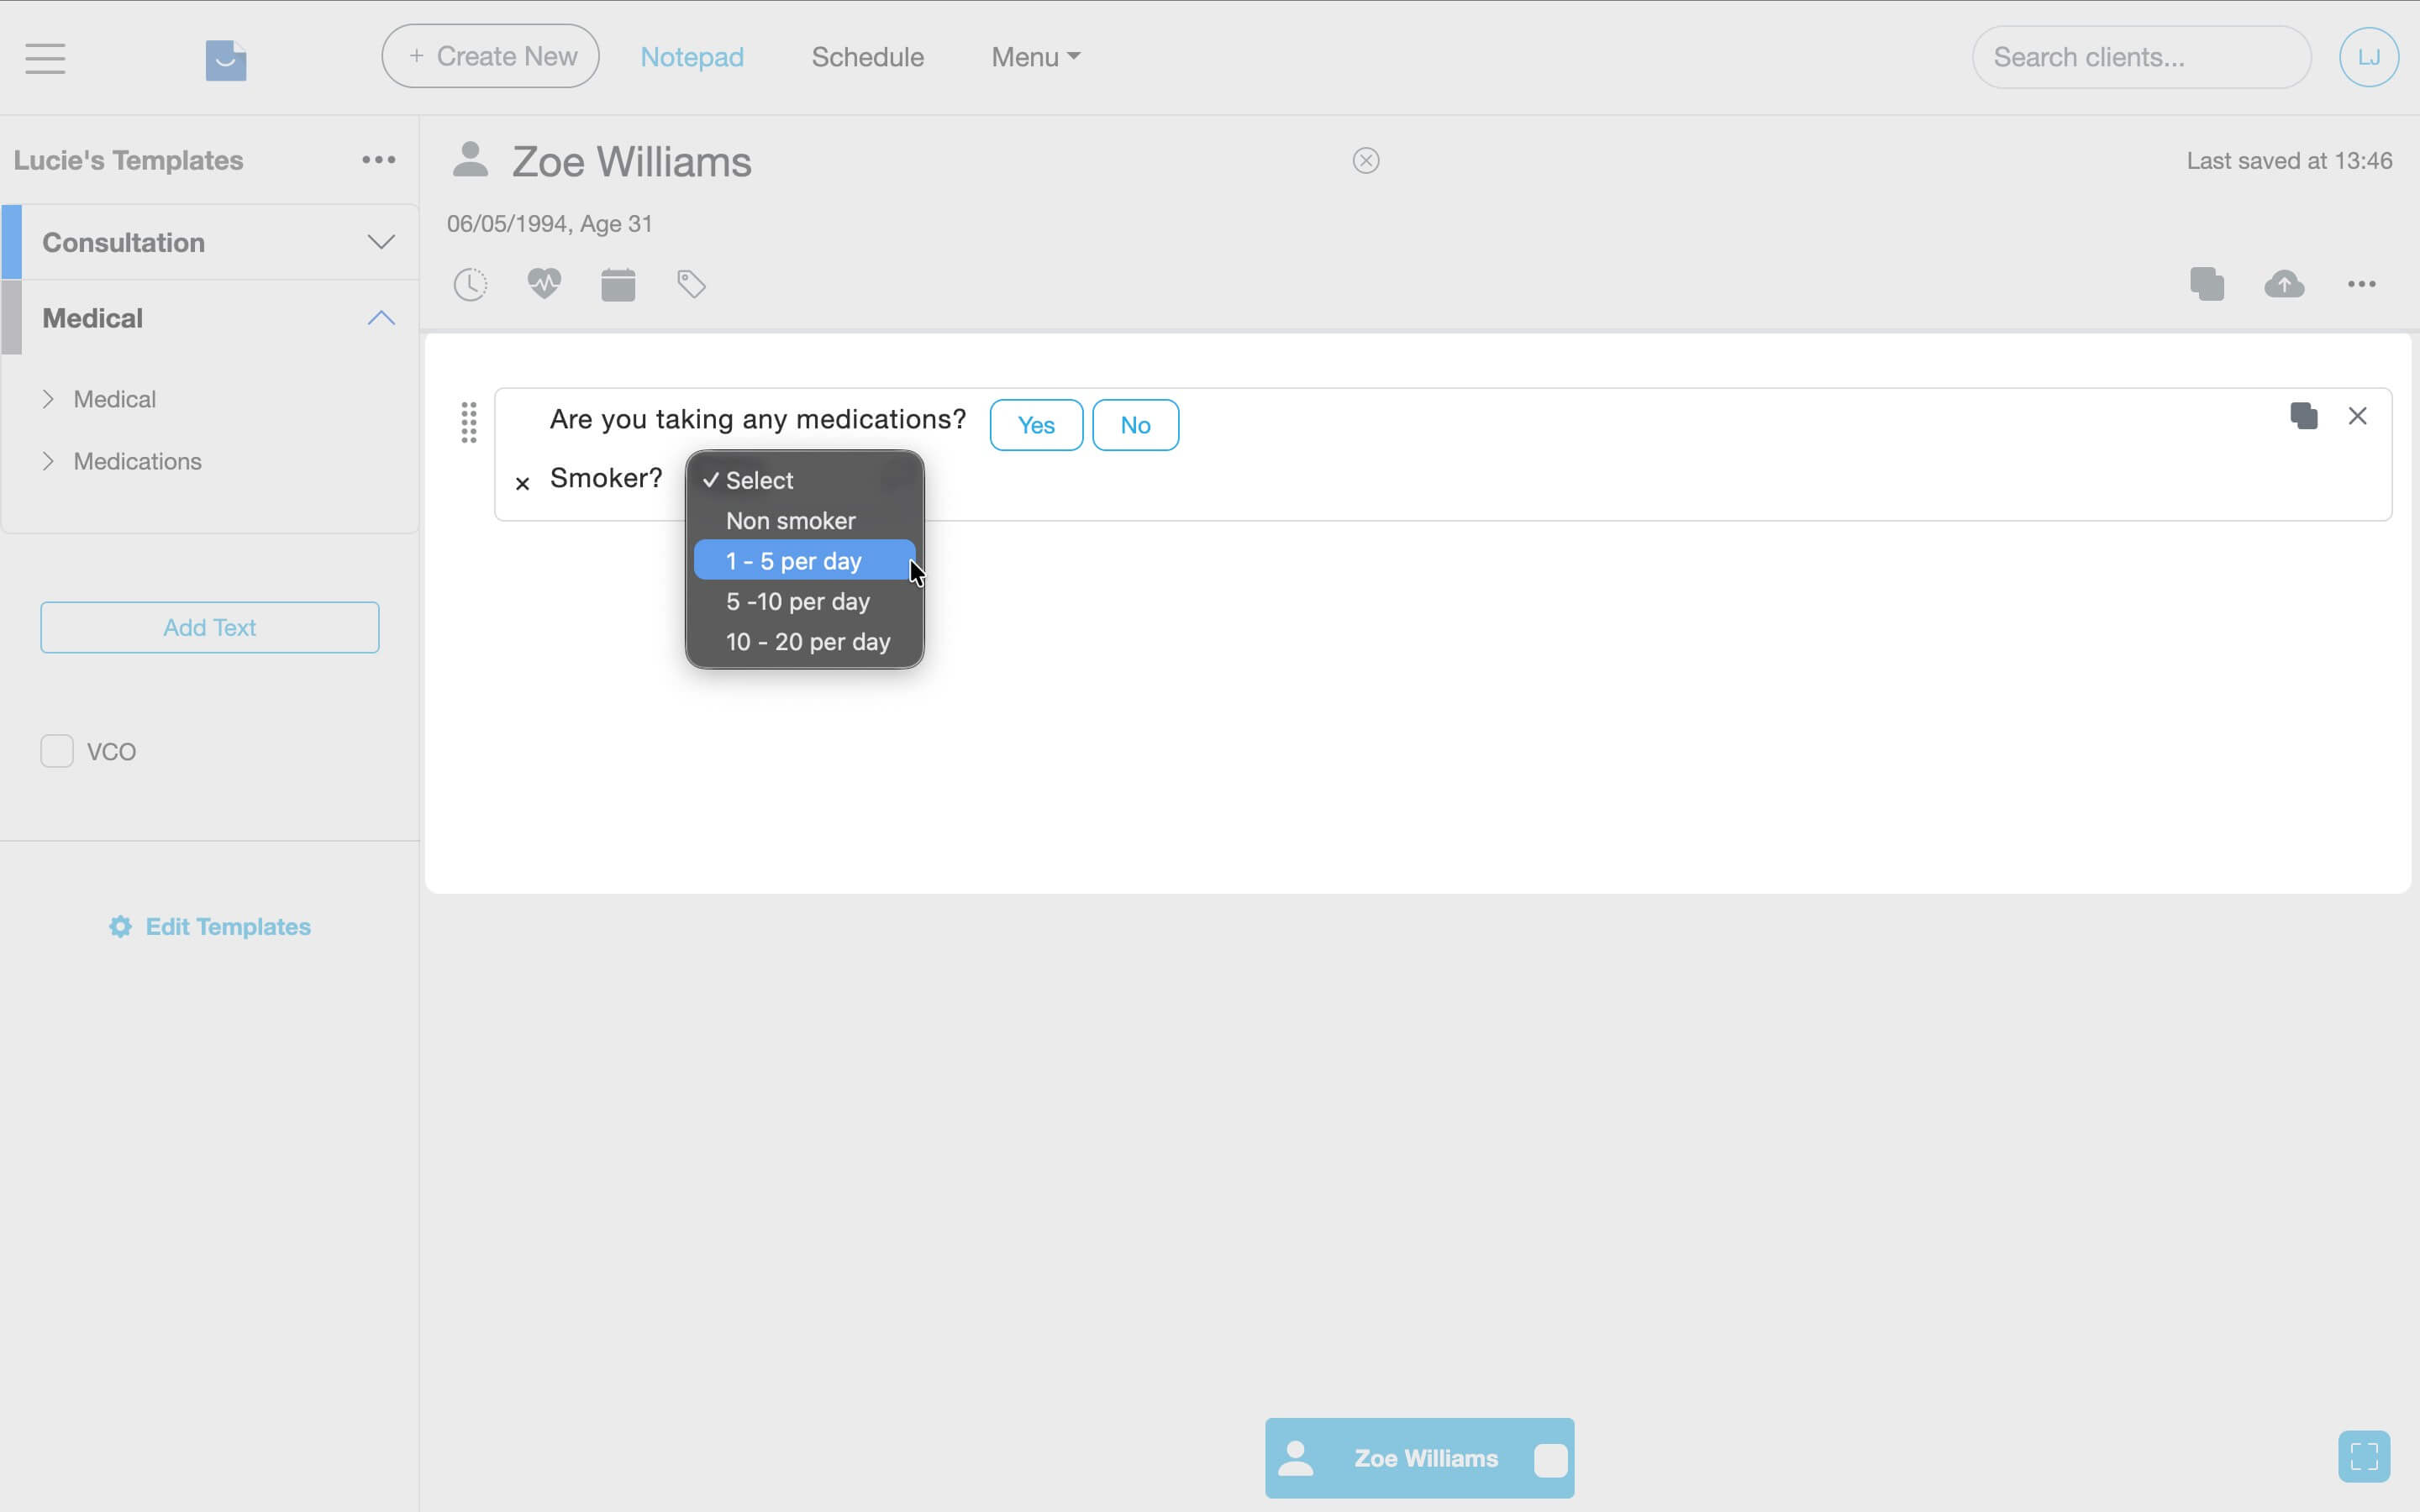
When writing a note, click buttons or choose a dropdown option to insert consistent wording instantly.
Edit existing templates
Need to make changes or update your templates? Follow these steps to edit an existing template.
- In the Notepad, select Edit Templates from the side panel.
- Click on a Category to show the templates then click the settings icon next to the template.
-
Select Edit from the menu

Click the settings icon next to a template and select “Edit” to update an existing note template. - Make changes to your template then Save to update changes.
Frequent questions
Basic templates are plain text. Advanced templates include interactive buttons and dropdown menus.
Templates live inside a Collection and are organised into Categories (folders).
Create an Advanced template, open the three-dots menu (⋯), choose Add Button, then rename options and save.
In an Advanced template, open the three-dots menu (⋯), choose Add dropdown, add your options with the + icon, then save.
Yes. Go to Notepad → Edit Templates, open the template and update the fields/options, then click Save.
When you use the template in a note, you can click buttons or pick a dropdown option to insert consistent wording quickly.
Buttons and dropdowns only appear in the Advanced editor. If you created a Basic template, switch to Advanced for interactive fields.
Yes. When creating or editing, use the Category dropdown to choose where the template should be stored.
Related articles
Updated: 18 February 2026