USER GUIDES
Adding a new location to your calendar
Overview
In Smilenotes, a 'Location' refers to the geographic location of your workplace. Smilenote's lets you create and manage individual schedules and bookings for each location. If you're on the Team plan, you can assign specific team members to each location based on who works there. You can easily switch between locations to view staff schedules and appointments.
Who can modify these settings? : Account owner or admin users.
Add a new location
-
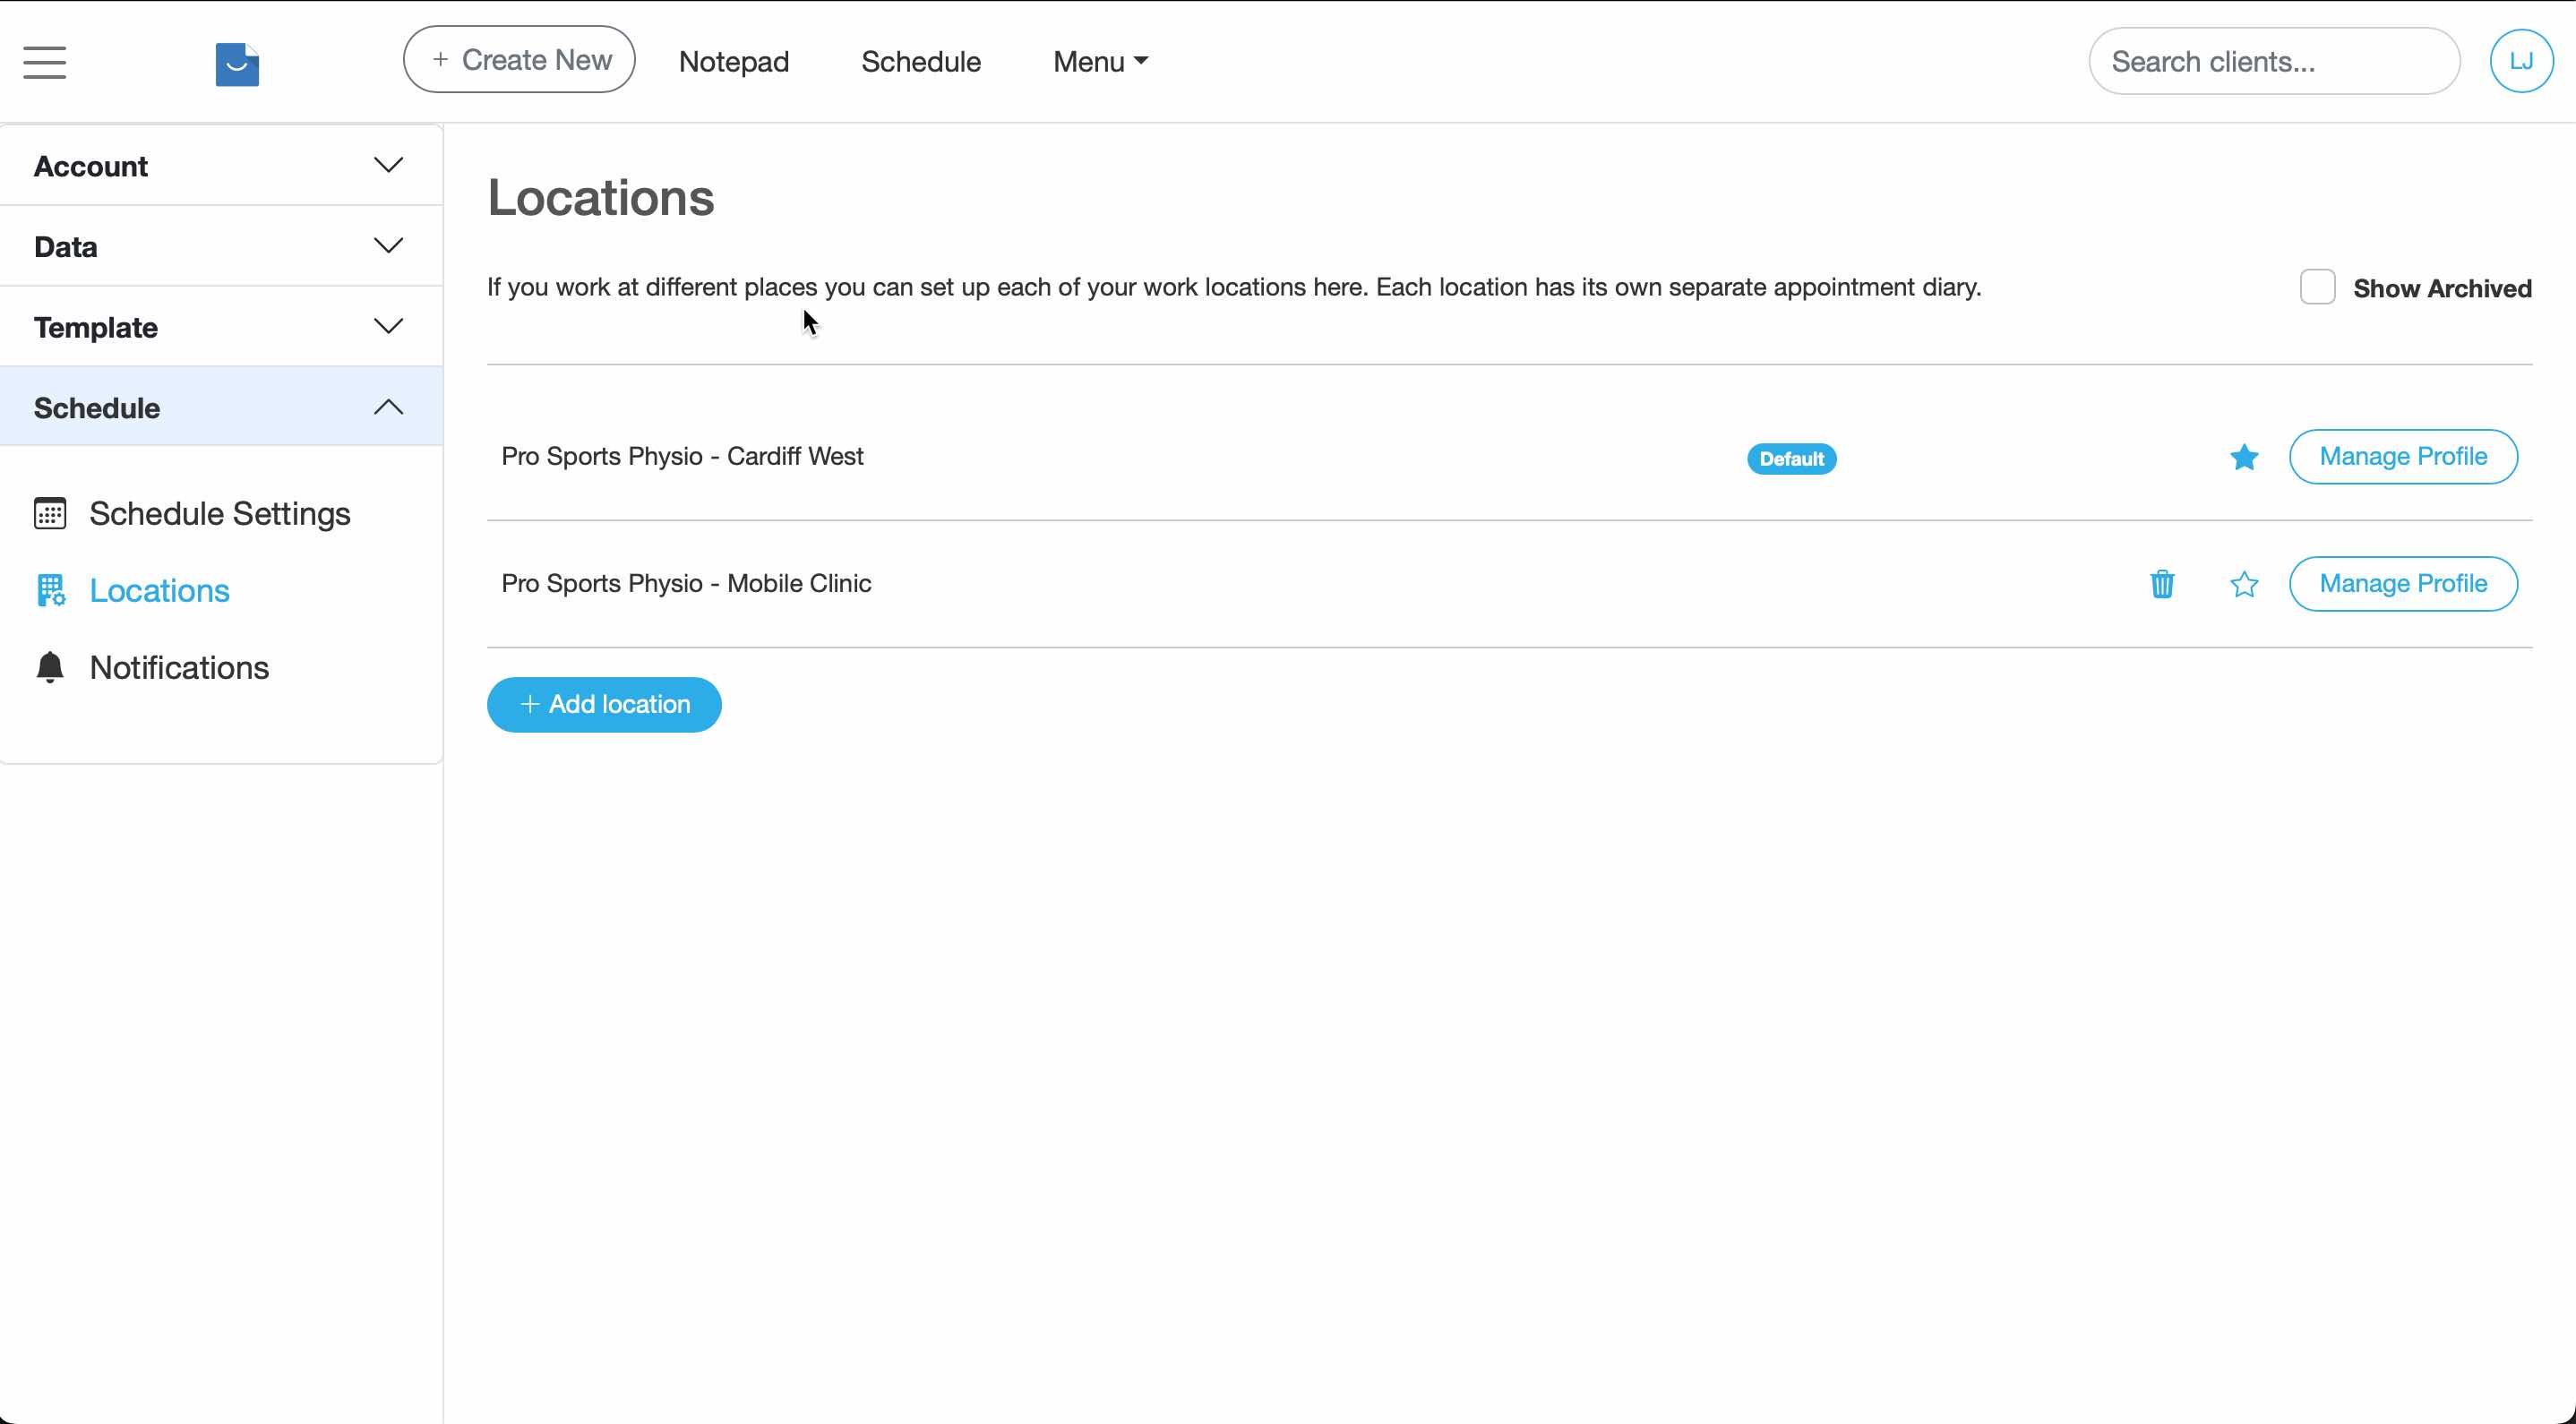
To add a new location head over the the settings page.
Settings > Schedule > "Locations" then click ‘Add Location.
-
Complete the location profile and click save to add the new location.
-
This new location will now have it's own appointment calendar.
Why do I need to enter my location details? :
Smilenotes requires contact details, including a physical mailing address and your email address to comply with anti-spam laws, ensuring transparency and allowing recipients to easily contact you. If you do not enter details then email notifications and reminders will not work.
Archive a location you no longer need
-
On the settings page (Settings > Schedule > Locations), click "Manage Profile" next to the location.
-
Toggle the switch in the location profile to make the location "active" or "archived" and save the changes.
